etcd TLS集群部署
1. 概述
这是一个序列总结文档。
- 第1节 安装etcd 中,在CentOS7上面安装etcd。
- 第2节 单节点运行etcd 在单节点上面运行etcd。
- 第3节 三节点部署etcd集群 在三节点上面部署etcd集群,并为etcd配置了一些快捷命令。
- 第4节 etcd TLS集群部署 在三节点上面部署etcd集群,并开启TLS协议的加密通讯。
1.1 VirtualBox虚拟机信息记录
学习etcd时,使用以下几个虚拟机:
| 序号 | 虚拟机 | 主机名 | IP | CPU | 内存 | 说明 |
|---|---|---|---|---|---|---|
| 1 | ansible-master | ansible | 192.168.56.120 | 2核 | 4G | Ansible控制节点 |
| 2 | ansible-node1 | etcd-node1 | 192.168.56.121 | 2核 | 2G | Ansible工作节点1 |
| 3 | ansible-node2 | etcd-node2 | 192.168.56.122 | 2核 | 2G | Ansible工作节点2 |
| 4 | ansible-node3 | etcd-node3 | 192.168.56.123 | 2核 | 2G | Ansible工作节点3 |
后面会编写使用ansible部署etcd集群的剧本。
操作系统说明:
[root@etcd-node1 ~]# cat /etc/centos-release
CentOS Linux release 7.9.2009 (Core)
[root@etcd-node1 ~]# hostname -I
192.168.56.121 10.0.3.15
[root@etcd-node1 ~]#1.2 配置思路
etcd开启TLS协议进行加密通讯,最主要的是配置一些证书,包含以下步骤:
- 生成 CA 证书。
- 为每个节点生成服务器证书,包含对应的 IP或域名在 SAN 中。
- 生成客户端证书(可选)。
- 在每个节点上安装证书,并配置 etcd 使用这些证书。
- 启动每个节点的 etcd 服务,并检查日志是否有错误。
- 使用 etcdctl 验证集群健康状态。
我之前在node1节点上面创建了CA证书,并颁发到三个节点后通过测试,ETCD开启TLS协议能正常工作。本次编写总结重新在node1节点上面创建相关证书文件,并详细记录过程,以便备忘。
2. 三服务器部署etcd TLS集群
参考官方文档How to Set Up a Demo etcd Cluster
- ectd端口中是 2379 用于客户端连接,提供HTTP API服务,供客户端交互。而 2380 用于伙伴通讯。
由于是在三个服务器上部署etcd集群,我们可以直接使用默认端口,我们先规划一下:
| 序号 | 节点名称 | 节点运行目录 | IP | 通讯端口 | 客户端端口 |
|---|---|---|---|---|---|
| 1 | node1 | /srv/etcd/node | 192.168.56.121 | 2380 | 2379 |
| 2 | node2 | /srv/etcd/node | 192.168.56.121 | 2380 | 2379 |
| 3 | node2 | /srv/etcd/node | 192.168.56.121 | 2380 | 2379 |
2.1 生成CA证书
CA(Certificate Authority,证书授权)是由认证机构服务者签发,是数字签名的技术基础保障,也是网上实体身份的证明,能够证明某一实体的身份及其公钥的合法性,证明该实体与公钥二者之间的匹配关系。
有很多方式可以创建CA证书和私钥,其中比较流行的有两种:
- openssl
- cfssl
这里先使用openssl来生成私钥ca.key和证书ca.crt。
在节点node1上面root家目录创建一个目录cacenter用于存放相关证书。
[root@etcd-node1 ~]# mkdir cacenter
[root@etcd-node1 ~]# ll cacenter/
total 0
[root@etcd-node1 ~]# cd cacenter/
[root@etcd-node1 cacenter]# ll
total 0
[root@etcd-node1 ~]#然后,在cacenter目录下生成相关证书。
可使用以下命令生成CA私钥和CA证书:
# 生成 CA 私钥
openssl genrsa -out ca.key 2048

# 生成自签名 CA 证书(有效期为 365 天)
openssl req -x509 -new -nodes -key ca.key -days 365 -out ca.crt -subj "/CN=etcd-ca"为了避免CA证书频繁过期,我们生成自签名CA证书时,将有效期证书成10年,也就是3650天。
实际操作如下:
[root@etcd-node1 cacenter]# openssl genrsa -out ca.key 2048
Generating RSA private key, 2048 bit long modulus
.+++
............+++
e is 65537 (0x10001)
[root@etcd-node1 cacenter]# echo $?
0
[root@etcd-node1 cacenter]# ll
total 4
-rw-r--r-- 1 root root 1675 Apr  6 22:46 ca.key
[root@etcd-node1 cacenter]# openssl req -x509 -new -nodes -key ca.key -days 3650 -out ca.crt -subj "/CN=etcd-ca"
[root@etcd-node1 cacenter]# echo $?
0
[root@etcd-node1 cacenter]# ll
total 8
-rw-r--r-- 1 root root 1090 Apr  6 22:47 ca.crt
-rw-r--r-- 1 root root 1675 Apr  6 22:46 ca.key
[root@etcd-node1 cacenter]#可以看到私钥文件ca.key和证书文件ca.crt已经创建成功。
2.2 查看CA证书有效时间
可以使用以下命令检查CA证书有效时间:
openssl x509 -in ca.crt -noout -text | grep 'Not'查看刚才生成的证书有效时间:
[root@etcd-node1 cacenter]# openssl x509 -in ca.crt -noout -text | grep 'Not'
            Not Before: Apr  6 14:47:21 2025 GMT
            Not After : Apr  4 14:47:21 2035 GMT
[root@etcd-node1 cacenter]# date
Sun Apr 6 22:50:05 CST 2025GMT是格林威治标准时间,北京时间比格林威治标准时间快8小时。
2.3 为每个节点生成证书
以节点node1(IP: 192.168.56.121)为例。
2.3.1 生成私钥和CSR
# 创建私钥
openssl genrsa -out node1.key 2048

# 创建 CSR 配置文件 node1.cnf
cat > node1.cnf << EOF
[req]
distinguished_name = req_distinguished_name
req_extensions = v3_req
prompt = no

[req_distinguished_name]
CN = node1  # 节点名称

[v3_req]
basicConstraints = CA:FALSE
keyUsage = nonRepudiation, digitalSignature, keyEncipherment
subjectAltName = @alt_names

[alt_names]
IP.1 = 192.168.56.121  # 节点的 IP
EOF

# 生成 CSR
openssl req -new -key node1.key -out node1.csr -config node1.cnf什么是 CSR?
CSR 即证书签名申请(Certificate Signing Request),获取 SSL 证书,需要先生成 CSR 文件并提交给证书颁发机构(CA)。CSR 包含了用于签发证书的公钥、用于辨识的名称信息(Distinguished Name)(例如域名)、真实性和完整性保护(例如数字签名),通常从 Web 服务器生成 CSR,同时创建加解密的公钥私钥对。
在创建 CSR 过程中,需要提供相关组织机构信息,web 服务器会根据提供的信息创建证书的标识名称,用来识别证书,内容如下:
国家或地区代码 您的组织机构依法注册所在的国家或地区的代码,以国际标准化组织(ISO)的两字母格式表示。
省或市或自治区 您的组织机构所在的省或市或自治区。
城市或地区 您的组织机构注册所在的城市或地区。
组织机构 您的企业依法注册所用的名称。
组织机构单位 此字段用于区分组织机构中的各部门,例如 “工程部” 或 “人力资源部”。
通用名称 在 CSR 的通用名称字段中输入的名称必须是您要为其使用证书的网站的完全限定域名(FQDN),例如 “www.domainnamegoeshere”。
但是腾讯云采用了在线生成 CSR 的方式,无需您生成和提交 CSR 文件,域名型证书仅需要提交通用名称即可申请,帮助您简化申请流程。
实际操作如下:
[root@etcd-node1 cacenter]# openssl genrsa -out node1.key 2048
Generating RSA private key, 2048 bit long modulus
.......................................................................................................................................+++
........+++
e is 65537 (0x10001)
[root@etcd-node1 cacenter]# ll node1.key
-rw-r--r-- 1 root root 1675 Apr  6 22:58 node1.key
[root@etcd-node1 cacenter]# cat > node1.cnf << EOF
> [req]
> distinguished_name = req_distinguished_name
> req_extensions = v3_req
> prompt = no
>
> [req_distinguished_name]
> CN = node1  # 节点名称
>
> [v3_req]
> basicConstraints = CA:FALSE
> keyUsage = nonRepudiation, digitalSignature, keyEncipherment
> subjectAltName = @alt_names
>
> [alt_names]
> IP.1 = 192.168.56.121  # 节点的 IP
> EOF
[root@etcd-node1 cacenter]# cat node1.cnf
[req]
distinguished_name = req_distinguished_name
req_extensions = v3_req
prompt = no

[req_distinguished_name]
CN = node1  # 节点名称

[v3_req]
basicConstraints = CA:FALSE
keyUsage = nonRepudiation, digitalSignature, keyEncipherment
subjectAltName = @alt_names

[alt_names]
IP.1 = 192.168.56.121  # 节点的 IP
[root@etcd-node1 cacenter]# openssl req -new -key node1.key -out node1.csr -config node1.cnf
[root@etcd-node1 cacenter]# ll
total 20
-rw-r--r-- 1 root root 1090 Apr  6 22:47 ca.crt
-rw-r--r-- 1 root root 1675 Apr  6 22:46 ca.key
-rw-r--r-- 1 root root  317 Apr  6 22:58 node1.cnf
-rw-r--r-- 1 root root  964 Apr  6 22:58 node1.csr
-rw-r--r-- 1 root root 1675 Apr  6 22:58 node1.key
[root@etcd-node1 cacenter]#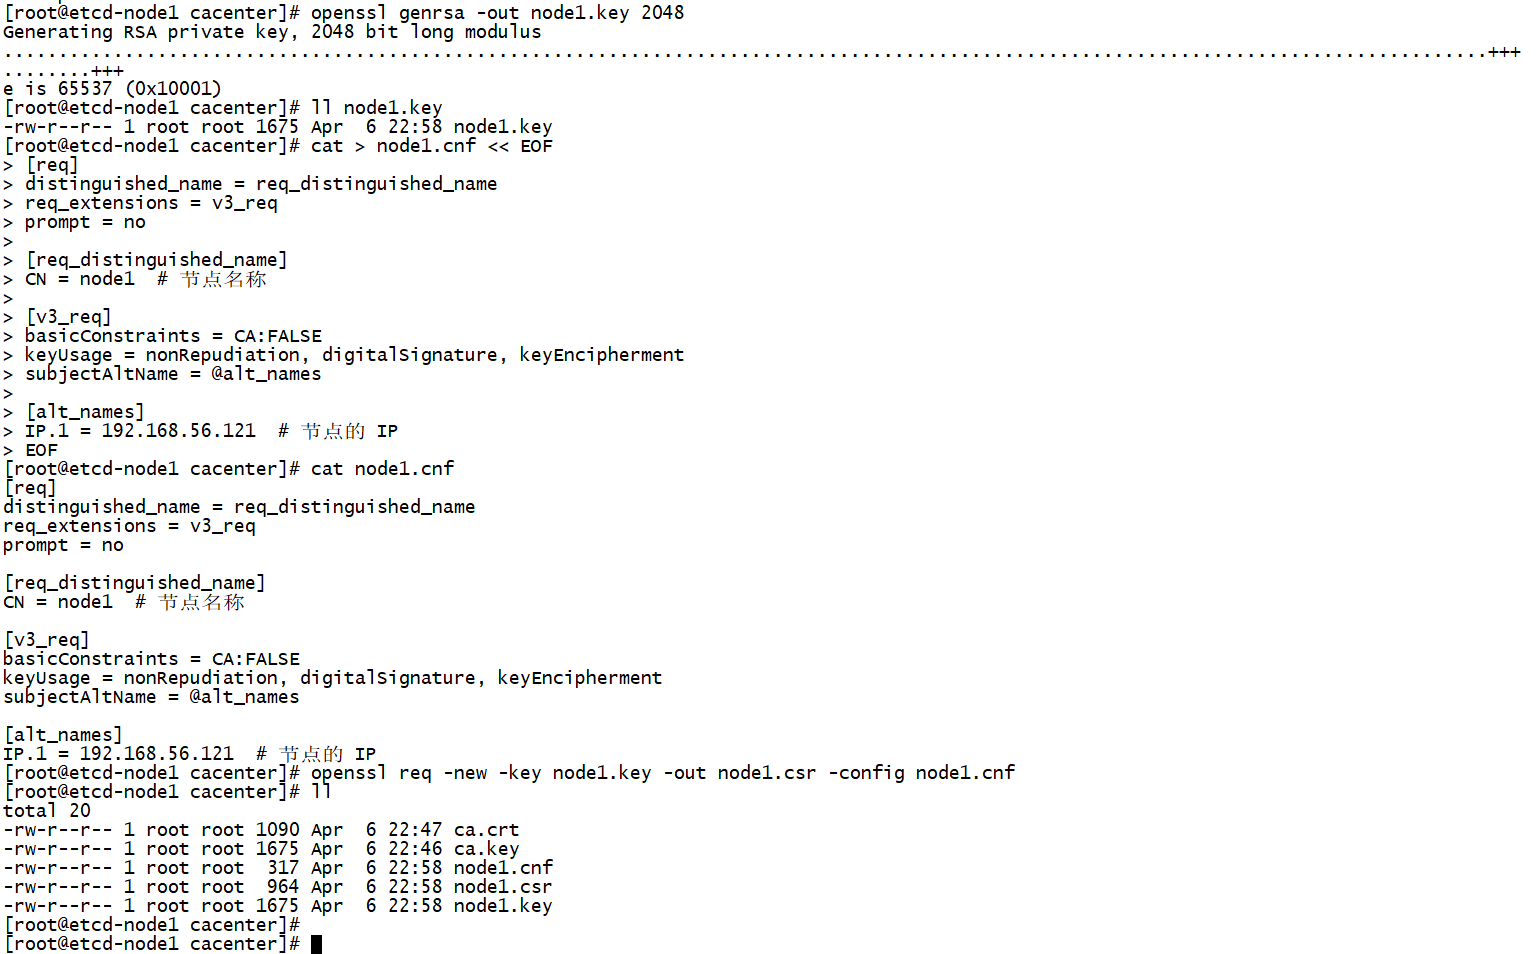
2.3.2 用 CA 签发证书
执行以下命令就可以用CA签发证书:
openssl x509 -req -in node1.csr -CA ca.crt -CAkey ca.key -CAcreateserial -out node1.crt -days 365 -extensions v3_req -extfile node1.cnf为了后面能检查到etcd证书过期抛出异常,我们设置证书有效果为5天。
实际操作如下:
> ^Cout node1.crt -days 5 -extensions v3_req -extfile node1.cnf
[root@etcd-node1 cacenter]# openssl x509 -req -in node1.csr -CA ca.crt -CAkey ca.key -CAcreateserial -out node1.crt -days 5 -extensions v3_req -extfile node1.cnf
Signature ok
subject=/CN=node1
Getting CA Private Key
[root@etcd-node1 cacenter]# ll
total 28
-rw-r--r-- 1 root root 1090 Apr  6 22:47 ca.crt
-rw-r--r-- 1 root root 1675 Apr  6 22:46 ca.key
-rw-r--r-- 1 root root   17 Apr  6 23:04 ca.srl
-rw-r--r-- 1 root root  317 Apr  6 22:58 node1.cnf
-rw-r--r-- 1 root root 1038 Apr  6 23:04 node1.crt
-rw-r--r-- 1 root root  964 Apr  6 22:58 node1.csr
-rw-r--r-- 1 root root 1675 Apr  6 22:58 node1.key
[root@etcd-node1 cacenter]#2.3.3 查看证书有效时间
[root@etcd-node1 cacenter]# openssl x509 -in node1.crt -noout -text | grep 'Not'
            Not Before: Apr  6 15:04:52 2025 GMT
            Not After : Apr 11 15:04:52 2025 GMT
[root@etcd-node1 cacenter]#可以看到证书有效时间到 Apr 11 15:04:52 2025 GMT,也就是4月11日。
2.3.4 生成其他节点证书
重复上述步骤,为 node2(IP: 192.168.56.122)和 node3(IP: 192.168.56.123)生成证书,需修改 CN 和 alt_names 中的 IP。
复制配置文件:
[root@etcd-node1 cacenter]# cp -p node1.cnf node2.cnf && sed -i 's/192.168.56.121/192.168.56.122/g' node2.cnf && sed -i 's/node1/node2/g' node2.cnf
[root@etcd-node1 cacenter]# diff node1.cnf node2.cnf
7c7
< CN = node1  # 节点名称
---
> CN = node2  # 节点名称
15c15
< IP.1 = 192.168.56.121  # 节点的 IP
---
> IP.1 = 192.168.56.122  # 节点的 IP
[root@etcd-node1 cacenter]#生成节点node2的证书:
[root@etcd-node1 cacenter]# ll
total 32
-rw-r--r-- 1 root root 1090 Apr  6 22:47 ca.crt
-rw-r--r-- 1 root root 1675 Apr  6 22:46 ca.key
-rw-r--r-- 1 root root   17 Apr  6 23:04 ca.srl
-rw-r--r-- 1 root root  317 Apr  6 22:58 node1.cnf
-rw-r--r-- 1 root root 1038 Apr  6 23:04 node1.crt
-rw-r--r-- 1 root root  964 Apr  6 22:58 node1.csr
-rw-r--r-- 1 root root 1675 Apr  6 22:58 node1.key
-rw-r--r-- 1 root root  317 Apr  6 23:09 node2.cnf
[root@etcd-node1 cacenter]# openssl genrsa -out node2.key 2048 && openssl req -new -key node2.key -out node2.csr -config node2.cnf && openssl x509 -req -in node2.csr -CA ca.crt -CAkey ca.key -CAcreateserial -out node2.crt -days 5 -extensions v3_req -extfile node2.cnf
Generating RSA private key, 2048 bit long modulus
...................................+++
........................+++
e is 65537 (0x10001)
Signature ok
subject=/CN=node2
Getting CA Private Key
[root@etcd-node1 cacenter]# ll
total 44
-rw-r--r-- 1 root root 1090 Apr  6 22:47 ca.crt
-rw-r--r-- 1 root root 1675 Apr  6 22:46 ca.key
-rw-r--r-- 1 root root   17 Apr  6 23:13 ca.srl
-rw-r--r-- 1 root root  317 Apr  6 22:58 node1.cnf
-rw-r--r-- 1 root root 1038 Apr  6 23:04 node1.crt
-rw-r--r-- 1 root root  964 Apr  6 22:58 node1.csr
-rw-r--r-- 1 root root 1675 Apr  6 22:58 node1.key
-rw-r--r-- 1 root root  317 Apr  6 23:09 node2.cnf
-rw-r--r-- 1 root root 1038 Apr  6 23:13 node2.crt
-rw-r--r-- 1 root root  964 Apr  6 23:13 node2.csr
-rw-r--r-- 1 root root 1675 Apr  6 23:13 node2.key
[root@etcd-node1 cacenter]#生成节点node3的证书:
# 节点3,复制配置文件
cp -p node1.cnf node3.cnf && sed -i 's/192.168.56.121/192.168.56.123/g' node3.cnf && sed -i 's/node1/node3/g' node3.cnf

# 生成证书
openssl genrsa -out node3.key 2048 && openssl req -new -key node3.key -out node3.csr -config node3.cnf && openssl x509 -req -in node3.csr -CA ca.crt -CAkey ca.key -CAcreateserial -out node3.crt -days 5 -extensions v3_req -extfile node3.cnf实操:
[root@etcd-node1 cacenter]# cp -p node1.cnf node3.cnf && sed -i 's/192.168.56.121/192.168.56.123/g' node3.cnf && sed -i 's/node1/node3/g' node3.cnf
[root@etcd-node1 cacenter]# diff node1.cnf node3.cnf
7c7
< CN = node1  # 节点名称
---
> CN = node3  # 节点名称
15c15
< IP.1 = 192.168.56.121  # 节点的 IP
---
> IP.1 = 192.168.56.123  # 节点的 IP
[root@etcd-node1 cacenter]# openssl genrsa -out node3.key 2048 && openssl req -new -key node3.key -out node3.csr -config node3.cnf && openssl x509 -req -in node3.csr -CA ca.crt -CAkey ca.key -CAcreateserial -out node3.crt -days 5 -extensions v3_req -extfile node3.cnf
Generating RSA private key, 2048 bit long modulus
.............+++
....................+++
e is 65537 (0x10001)
Signature ok
subject=/CN=node3
Getting CA Private Key
[root@etcd-node1 cacenter]# ll
total 60
-rw-r--r-- 1 root root 1090 Apr  6 22:47 ca.crt
-rw-r--r-- 1 root root 1675 Apr  6 22:46 ca.key
-rw-r--r-- 1 root root   17 Apr  6 23:17 ca.srl
-rw-r--r-- 1 root root  317 Apr  6 22:58 node1.cnf
-rw-r--r-- 1 root root 1038 Apr  6 23:04 node1.crt
-rw-r--r-- 1 root root  964 Apr  6 22:58 node1.csr
-rw-r--r-- 1 root root 1675 Apr  6 22:58 node1.key
-rw-r--r-- 1 root root  317 Apr  6 23:09 node2.cnf
-rw-r--r-- 1 root root 1038 Apr  6 23:13 node2.crt
-rw-r--r-- 1 root root  964 Apr  6 23:13 node2.csr
-rw-r--r-- 1 root root 1675 Apr  6 23:13 node2.key
-rw-r--r-- 1 root root  317 Apr  6 23:16 node3.cnf
-rw-r--r-- 1 root root 1038 Apr  6 23:17 node3.crt
-rw-r--r-- 1 root root  964 Apr  6 23:17 node3.csr
-rw-r--r-- 1 root root 1679 Apr  6 23:17 node3.key
[root@etcd-node1 cacenter]#2.3.5 生成客户端证书
# 生成客户端私钥和 CSR
openssl genrsa -out client.key 2048
openssl req -new -key client.key -out client.csr -subj "/CN=etcd-client"

# 签发证书
openssl x509 -req -in client.csr -CA ca.crt -CAkey ca.key -CAcreateserial -out client.crt -days 365我们也将证书有效期设置成5天。
[root@etcd-node1 cacenter]# openssl genrsa -out client.key 2048
Generating RSA private key, 2048 bit long modulus
...............................................+++
.....+++
e is 65537 (0x10001)
[root@etcd-node1 cacenter]# openssl req -new -key client.key -out client.csr -subj "/CN=etcd-client"
[root@etcd-node1 cacenter]# openssl x509 -req -in client.csr -CA ca.crt -CAkey ca.key -CAcreateserial -out client.crt -days 5
Signature ok
subject=/CN=etcd-client
Getting CA Private Key
[root@etcd-node1 cacenter]# ll
total 72
-rw-r--r-- 1 root root 1090 Apr  6 22:47 ca.crt
-rw-r--r-- 1 root root 1675 Apr  6 22:46 ca.key
-rw-r--r-- 1 root root   17 Apr  6 23:20 ca.srl
-rw-r--r-- 1 root root  977 Apr  6 23:20 client.crt
-rw-r--r-- 1 root root  895 Apr  6 23:19 client.csr
-rw-r--r-- 1 root root 1675 Apr  6 23:19 client.key
-rw-r--r-- 1 root root  317 Apr  6 22:58 node1.cnf
-rw-r--r-- 1 root root 1038 Apr  6 23:04 node1.crt
-rw-r--r-- 1 root root  964 Apr  6 22:58 node1.csr
-rw-r--r-- 1 root root 1675 Apr  6 22:58 node1.key
-rw-r--r-- 1 root root  317 Apr  6 23:09 node2.cnf
-rw-r--r-- 1 root root 1038 Apr  6 23:13 node2.crt
-rw-r--r-- 1 root root  964 Apr  6 23:13 node2.csr
-rw-r--r-- 1 root root 1675 Apr  6 23:13 node2.key
-rw-r--r-- 1 root root  317 Apr  6 23:16 node3.cnf
-rw-r--r-- 1 root root 1038 Apr  6 23:17 node3.crt
-rw-r--r-- 1 root root  964 Apr  6 23:17 node3.csr
-rw-r--r-- 1 root root 1679 Apr  6 23:17 node3.key
[root@etcd-node1 cacenter]#至此,相关证书文件都生成完成。
2.4 分发证书到各节点
将以下文件分发到每个节点的 /etc/etcd/ssl 目录:
ca.crt(公共 CA 证书)nodeX.crt和nodeX.key(节点证书和私钥)- (可选)
client.crt和client.key
先在三个节点上面创建 /etc/etcd/ssl 目录,用于存放证书文件:
mkdir -p /etc/etcd/ssl各节点操作如下:
# 节点node1创建证书存放目录
[root@etcd-node1 ~]# mkdir -p /etc/etcd/ssl
[root@etcd-node1 ~]# ll /etc/etcd/ssl
total 0
[root@etcd-node1 ~]#

# 节点node2创建证书存放目录
[root@etcd-node2 ~]# mkdir -p /etc/etcd/ssl
[root@etcd-node2 ~]# ll /etc/etcd/ssl
total 0
[root@etcd-node2 ~]#

# 节点node3创建证书存放目录
[root@etcd-node3 ~]# mkdir -p /etc/etcd/ssl
[root@etcd-node3 ~]# ll /etc/etcd/ssl
total 0
[root@etcd-node3 ~]#2.4.1 分发证书到node1节点
执行以下命令:
[root@etcd-node1 ~]# cd cacenter/
[root@etcd-node1 cacenter]# cp -p ca.crt node1.crt node1.key client.crt client.key /etc/etcd/ssl/
[root@etcd-node1 cacenter]# ll /etc/etcd/ssl
total 20
-rw-r--r-- 1 root root 1090 Apr  6 22:47 ca.crt
-rw-r--r-- 1 root root  977 Apr  6 23:20 client.crt
-rw-r--r-- 1 root root 1675 Apr  6 23:19 client.key
-rw-r--r-- 1 root root 1038 Apr  6 23:04 node1.crt
-rw-r--r-- 1 root root 1675 Apr  6 22:58 node1.key
[root@etcd-node1 cacenter]#2.4.2 分发证书到node2节点
执行以下命令:
# 注意,scp复制文件和ssh执行远程命令时都需要输入节点node2的root密码
[root@etcd-node1 cacenter]# scp ca.crt node2.crt node2.key client.crt client.key root@192.168.56.122:/etc/etcd/ssl/ && ssh root@192.168.56.122 "ls -lah /etc/etcd/ssl"
root@192.168.56.122's password:
ca.crt                                                                                                                                                                                              100% 1090     2.6MB/s   00:00
node2.crt                                                                                                                                                                                           100% 1038     1.4MB/s   00:00
node2.key                                                                                                                                                                                           100% 1675     2.7MB/s   00:00
client.crt                                                                                                                                                                                          100%  977     2.1MB/s   00:00
client.key                                                                                                                                                                                          100% 1675     3.2MB/s   00:00
root@192.168.56.122's password:
total 20K
drwxr-xr-x 2 root root   90 Apr  8 23:07 .
drwxr-xr-x 4 root root   32 Apr  8 22:58 ..
-rw-r--r-- 1 root root 1.1K Apr  8 23:07 ca.crt
-rw-r--r-- 1 root root  977 Apr  8 23:07 client.crt
-rw-r--r-- 1 root root 1.7K Apr  8 23:07 client.key
-rw-r--r-- 1 root root 1.1K Apr  8 23:07 node2.crt
-rw-r--r-- 1 root root 1.7K Apr  8 23:07 node2.key
[root@etcd-node1 cacenter]#2.4.2 分发证书到node3节点
执行以下命令:
# 注意,scp复制文件和ssh执行远程命令时都需要输入节点node3的root密码
[root@etcd-node1 cacenter]# scp ca.crt node3.crt node3.key client.crt client.key root@192.168.56.123:/etc/etcd/ssl/ && ssh root@192.168.56.123 "ls -lah /etc/etcd/ssl"
root@192.168.56.123's password:
ca.crt                                                                                                                                                                                              100% 1090     2.6MB/s   00:00
node3.crt                                                                                                                                                                                           100% 1038     1.4MB/s   00:00
node3.key                                                                                                                                                                                           100% 1679     2.6MB/s   00:00
client.crt                                                                                                                                                                                          100%  977     2.3MB/s   00:00
client.key                                                                                                                                                                                          100% 1675     3.6MB/s   00:00
root@192.168.56.123's password:
total 20K
drwxr-xr-x 2 root root   90 Apr  8 23:10 .
drwxr-xr-x 4 root root   32 Apr  8 22:58 ..
-rw-r--r-- 1 root root 1.1K Apr  8 23:10 ca.crt
-rw-r--r-- 1 root root  977 Apr  8 23:10 client.crt
-rw-r--r-- 1 root root 1.7K Apr  8 23:10 client.key
-rw-r--r-- 1 root root 1.1K Apr  8 23:10 node3.crt
-rw-r--r-- 1 root root 1.7K Apr  8 23:10 node3.key
[root@etcd-node1 cacenter]#此时三个节点的证书都分发完成。

2.5 启动三个节点的etcd服务
参考单节点部署etcd服务,配置不同的启动脚本。
查看第1个启动脚本:
[root@etcd-node1 etcd]# cat node/start.sh
#!/bin/bash
TOKEN=token-01
CLUSTER_STATE=new
NAME_1=node1
NAME_2=node2
NAME_3=node3
HOST_1=192.168.56.121
HOST_2=192.168.56.122
HOST_3=192.168.56.123
PEER_PORT_1=2380
PEER_PORT_2=2380
PEER_PORT_3=2380
API_PORT_1=2379
API_PORT_2=2379
API_PORT_3=2379
START_PATH_1=/srv/etcd/node
START_PATH_2=/srv/etcd/node
START_PATH_3=/srv/etcd/node
CLUSTER=${NAME_1}=https://${HOST_1}:${PEER_PORT_1},${NAME_2}=https://${HOST_2}:${PEER_PORT_2},${NAME_3}=https://${HOST_3}:${PEER_PORT_3}
echo "CLUSTER:${CLUSTER}"
NODE_NAME_1=node1
NODE_NAME_2=node2
NODE_NAME_3=node3


# 节点1
THIS_NAME=${NAME_1}
THIS_IP=${HOST_1}
THIS_NODE_NAME=${NODE_NAME_1}
# 证书路径配置(假设证书存放在 /etc/etcd/ssl 目录)
CA_CERT="/etc/etcd/ssl/ca.crt"
NODE_CERT="/etc/etcd/ssl/${THIS_NODE_NAME}.crt"
NODE_KEY="/etc/etcd/ssl/${THIS_NODE_NAME}.key"

cd ${START_PATH_1}
nohup etcd \
    --data-dir=data.etcd \
    --name ${THIS_NAME} \
    --initial-advertise-peer-urls https://${THIS_IP}:${PEER_PORT_1} \
    --listen-peer-urls https://${THIS_IP}:${PEER_PORT_1} \
    --advertise-client-urls https://${THIS_IP}:${API_PORT_1} \
    --listen-client-urls https://${THIS_IP}:${API_PORT_1} \
    --initial-cluster ${CLUSTER} \
    --initial-cluster-state ${CLUSTER_STATE} \
    --initial-cluster-token ${TOKEN} \
    --client-cert-auth \
    --trusted-ca-file ${CA_CERT} \
    --cert-file ${NODE_CERT} \
    --key-file ${NODE_KEY} \
    --peer-client-cert-auth \
    --peer-trusted-ca-file ${CA_CERT} \
    --peer-cert-file ${NODE_CERT} \
    --peer-key-file ${NODE_KEY} &

[root@etcd-node1 etcd]#此处增加etcd启动命令时各参数的说明:
| 参数 | 作用 |
|---|---|
--date-dir | 数据存储目录的路径 |
--name | 节点名称,需唯一 |
--initial-advertise-peer-urls | 向集群中其他成员宣传的该节点的对等节点URL列表 |
--listen-peer-urls | 节点间通信监听的 URL 列表,用于集群节点间数据同步 |
--advertise-client-urls | 向客户端宣告的访问地址,客户端实际使用的 URL |
--listen-client-urls | 客户端通信监听的 URL 列表,用于接收客户端请求 |
--initial-cluster | 集群所有节点的名称和 URL 列表,格式为 name1=url1,name2=url2,... |
--initial-cluster-state | 集群初始状态,new 表示新建集群,existing 表示加入已有集群 |
--initial-cluster-token | 集群唯一标识符,用于区分不同集群,默认值可能冲突,建议自定义(如 etcd-cluster) |
--client-cert-auth | 启用客户端证书认证,要求客户端提供有效证书,需配合 --trusted-ca-file 使用 |
--trusted-ca-file | 客户端证书的信任 CA,用于验证客户端证书的合法性 |
--cert-file | 节点服务端证书路径,用于向客户端证明自身身份 |
--key-file | 节点服务端私钥,与 --cert-file 对应,需严格保护权限 (chmod 600) |
--peer-client-cert-auth | 启用节点间通信的证书认证,要求其他节点提供有效证书,需配合 --peer-trusted-ca-file 使用 |
--peer-trusted-ca-file | 节点间通信的信任 CA,用于验证其他节点证书的合法性,通常与客户端 CA 一致(如 /etc/etcd/ssl/ca.crt) |
--peer-cert-file | 节点间通信的证书 |
--peer-key-file | 节点间通信的私钥 |
查看第2个启动脚本:
[root@etcd-node2 etcd]# cat node/start.sh
#!/bin/bash
TOKEN=token-01
CLUSTER_STATE=new
NAME_1=node1
NAME_2=node2
NAME_3=node3
HOST_1=192.168.56.121
HOST_2=192.168.56.122
HOST_3=192.168.56.123
PEER_PORT_1=2380
PEER_PORT_2=2380
PEER_PORT_3=2380
API_PORT_1=2379
API_PORT_2=2379
API_PORT_3=2379
START_PATH_1=/srv/etcd/node
START_PATH_2=/srv/etcd/node
START_PATH_3=/srv/etcd/node
CLUSTER=${NAME_1}=https://${HOST_1}:${PEER_PORT_1},${NAME_2}=https://${HOST_2}:${PEER_PORT_2},${NAME_3}=https://${HOST_3}:${PEER_PORT_3}
echo "CLUSTER:${CLUSTER}"
NODE_NAME_1=node1
NODE_NAME_2=node2
NODE_NAME_3=node3


# 节点2
THIS_NAME=${NAME_2}
THIS_IP=${HOST_2}
THIS_NODE_NAME=${NODE_NAME_2}
# 证书路径配置(假设证书存放在 /etc/etcd/ssl 目录)
CA_CERT="/etc/etcd/ssl/ca.crt"
NODE_CERT="/etc/etcd/ssl/${THIS_NODE_NAME}.crt"
NODE_KEY="/etc/etcd/ssl/${THIS_NODE_NAME}.key"

cd ${START_PATH_2}
nohup etcd \
    --data-dir=data.etcd \
    --name ${THIS_NAME} \
    --initial-advertise-peer-urls https://${THIS_IP}:${PEER_PORT_1} \
    --listen-peer-urls https://${THIS_IP}:${PEER_PORT_1} \
    --advertise-client-urls https://${THIS_IP}:${API_PORT_1} \
    --listen-client-urls https://${THIS_IP}:${API_PORT_1} \
    --initial-cluster ${CLUSTER} \
    --initial-cluster-state ${CLUSTER_STATE} \
    --initial-cluster-token ${TOKEN} \
    --client-cert-auth \
    --trusted-ca-file ${CA_CERT} \
    --cert-file ${NODE_CERT} \
    --key-file ${NODE_KEY} \
    --peer-client-cert-auth \
    --peer-trusted-ca-file ${CA_CERT} \
    --peer-cert-file ${NODE_CERT} \
    --peer-key-file ${NODE_KEY} &

[root@etcd-node2 etcd]#查看第3个启动脚本:
[root@etcd-node3 etcd]# cat node/start.sh
#!/bin/bash
TOKEN=token-01
CLUSTER_STATE=new
NAME_1=node1
NAME_2=node2
NAME_3=node3
HOST_1=192.168.56.121
HOST_2=192.168.56.122
HOST_3=192.168.56.123
PEER_PORT_1=2380
PEER_PORT_2=2380
PEER_PORT_3=2380
API_PORT_1=2379
API_PORT_2=2379
API_PORT_3=2379
START_PATH_1=/srv/etcd/node
START_PATH_2=/srv/etcd/node
START_PATH_3=/srv/etcd/node
CLUSTER=${NAME_1}=https://${HOST_1}:${PEER_PORT_1},${NAME_2}=https://${HOST_2}:${PEER_PORT_2},${NAME_3}=https://${HOST_3}:${PEER_PORT_3}
echo "CLUSTER:${CLUSTER}"
NODE_NAME_1=node1
NODE_NAME_2=node2
NODE_NAME_3=node3


# 节点3
THIS_NAME=${NAME_3}
THIS_IP=${HOST_3}
THIS_NODE_NAME=${NODE_NAME_3}
# 证书路径配置(假设证书存放在 /etc/etcd/ssl 目录)
CA_CERT="/etc/etcd/ssl/ca.crt"
NODE_CERT="/etc/etcd/ssl/${THIS_NODE_NAME}.crt"
NODE_KEY="/etc/etcd/ssl/${THIS_NODE_NAME}.key"

cd ${START_PATH_3}
nohup etcd \
    --data-dir=data.etcd \
    --name ${THIS_NAME} \
    --initial-advertise-peer-urls https://${THIS_IP}:${PEER_PORT_1} \
    --listen-peer-urls https://${THIS_IP}:${PEER_PORT_1} \
    --advertise-client-urls https://${THIS_IP}:${API_PORT_1} \
    --listen-client-urls https://${THIS_IP}:${API_PORT_1} \
    --initial-cluster ${CLUSTER} \
    --initial-cluster-state ${CLUSTER_STATE} \
    --initial-cluster-token ${TOKEN} \
    --client-cert-auth \
    --trusted-ca-file ${CA_CERT} \
    --cert-file ${NODE_CERT} \
    --key-file ${NODE_KEY} \
    --peer-client-cert-auth \
    --peer-trusted-ca-file ${CA_CERT} \
    --peer-cert-file ${NODE_CERT} \
    --peer-key-file ${NODE_KEY} &

[root@etcd-node3 etcd]#三个节点分别执行启动脚本:
[root@etcd-node1 ~]# cd /srv/etcd/node && ./start.sh
CLUSTER:node1=https://192.168.56.121:2380,node2=https://192.168.56.122:2380,node3=https://192.168.56.123:2380
[root@etcd-node1 node]# nohup: appending output to ‘nohup.out’


[root@etcd-node2 ~]# cd /srv/etcd/node && ./start.sh
CLUSTER:node1=https://192.168.56.121:2380,node2=https://192.168.56.122:2380,node3=https://192.168.56.123:2380
[root@etcd-node2 node]# nohup: appending output to ‘nohup.out’


[root@etcd-node3 ~]# cd /srv/etcd/node && ./start.sh
CLUSTER:node1=https://192.168.56.121:2380,node2=https://192.168.56.122:2380,node3=https://192.168.56.123:2380
[root@etcd-node3 node]# nohup: appending output to ‘nohup.out’查看etcd进程和端口监听:
# 第1个节点
[root@etcd-node1 ~]# ps -ef|grep -v grep|grep etcd
root      1486     1  1 23:23 pts/0    00:00:01 etcd --data-dir=data.etcd --name node1 --initial-advertise-peer-urls https://192.168.56.121:2380 --listen-peer-urls https://192.168.56.121:2380 --advertise-client-urls https://192.168.56.121:2379 --listen-client-urls https://192.168.56.121:2379 --initial-cluster node1=https://192.168.56.121:2380,node2=https://192.168.56.122:2380,node3=https://192.168.56.123:2380 --initial-cluster-state new --initial-cluster-token token-01 --client-cert-auth --trusted-ca-file /etc/etcd/ssl/ca.crt --cert-file /etc/etcd/ssl/node1.crt --key-file /etc/etcd/ssl/node1.key --peer-client-cert-auth --peer-trusted-ca-file /etc/etcd/ssl/ca.crt --peer-cert-file /etc/etcd/ssl/node1.crt --peer-key-file /etc/etcd/ssl/node1.key
[root@etcd-node1 ~]# netstat -tunlp|grep etcd
tcp        0      0 192.168.56.121:2379     0.0.0.0:*               LISTEN      1486/etcd
tcp        0      0 192.168.56.121:2380     0.0.0.0:*               LISTEN      1486/etcd
[root@etcd-node1 ~]#


# 第2个节点
[root@etcd-node2 ~]# ps -ef|grep -v grep|grep etcd
root      1506     1  1 23:23 pts/0    00:00:01 etcd --data-dir=data.etcd --name node2 --initial-advertise-peer-urls https://192.168.56.122:2380 --listen-peer-urls https://192.168.56.122:2380 --advertise-client-urls https://192.168.56.122:2379 --listen-client-urls https://192.168.56.122:2379 --initial-cluster node1=https://192.168.56.121:2380,node2=https://192.168.56.122:2380,node3=https://192.168.56.123:2380 --initial-cluster-state new --initial-cluster-token token-01 --client-cert-auth --trusted-ca-file /etc/etcd/ssl/ca.crt --cert-file /etc/etcd/ssl/node2.crt --key-file /etc/etcd/ssl/node2.key --peer-client-cert-auth --peer-trusted-ca-file /etc/etcd/ssl/ca.crt --peer-cert-file /etc/etcd/ssl/node2.crt --peer-key-file /etc/etcd/ssl/node2.key
[root@etcd-node2 ~]# netstat -tunlp|grep etcd
tcp        0      0 192.168.56.122:2379     0.0.0.0:*               LISTEN      1506/etcd
tcp        0      0 192.168.56.122:2380     0.0.0.0:*               LISTEN      1506/etcd
[root@etcd-node2 ~]#


# 第3个节点
[root@etcd-node3 ~]# ps -ef|grep -v grep|grep etcd
root      1501     1  1 23:23 pts/0    00:00:01 etcd --data-dir=data.etcd --name node3 --initial-advertise-peer-urls https://192.168.56.123:2380 --listen-peer-urls https://192.168.56.123:2380 --advertise-client-urls https://192.168.56.123:2379 --listen-client-urls https://192.168.56.123:2379 --initial-cluster node1=https://192.168.56.121:2380,node2=https://192.168.56.122:2380,node3=https://192.168.56.123:2380 --initial-cluster-state new --initial-cluster-token token-01 --client-cert-auth --trusted-ca-file /etc/etcd/ssl/ca.crt --cert-file /etc/etcd/ssl/node3.crt --key-file /etc/etcd/ssl/node3.key --peer-client-cert-auth --peer-trusted-ca-file /etc/etcd/ssl/ca.crt --peer-cert-file /etc/etcd/ssl/node3.crt --peer-key-file /etc/etcd/ssl/node3.key
[root@etcd-node3 ~]# netstat -tunlp|grep etcd
tcp        0      0 192.168.56.123:2379     0.0.0.0:*               LISTEN      1501/etcd
tcp        0      0 192.168.56.123:2380     0.0.0.0:*               LISTEN      1501/etcd
[root@etcd-node3 ~]#3. 查看集群信息
将以下信息写入到~/.bashrc配置文件中:
export ETCDCTL_API=3
export HOST_1=192.168.56.121
export HOST_2=192.168.56.122
export HOST_3=192.168.56.123
export API_PORT_1=2379
export API_PORT_2=2379
export API_PORT_3=2379
export ENDPOINTS=https://${HOST_1}:${API_PORT_1},https://${HOST_2}:${API_PORT_2},https://${HOST_3}:${API_PORT_3}然后使用source ~/.bashrc使配置生效。
3.1 查看集群成员列表
3.1.1 不指定证书信息查看集群成员列表
生效后,查看集群成员列表信息,如果不带CA证书相关信息,则会提示“Error: context deadline exceeded”异常:
# 节点node1执行命令
[root@etcd-node1 ~]# etcdctl --endpoints=$ENDPOINTS --write-out=table  member list
{"level":"warn","ts":"2025-04-08T23:35:37.091521+0800","logger":"etcd-client","caller":"v3@v3.5.18/retry_interceptor.go:63","msg":"retrying of unary invoker failed","target":"etcd-endpoints://0xc0000361e0/192.168.56.121:2379","attempt":0,"error":"rpc error: code = DeadlineExceeded desc = latest balancer error: last connection error: connection error: desc = \"transport: authentication handshake failed: tls: failed to verify certificate: x509: certificate signed by unknown authority\""}
Error: context deadline exceeded
[root@etcd-node1 ~]#


# 节点node2执行命令
[root@etcd-node2 ~]# etcdctl --endpoints=$ENDPOINTS --write-out=table  member list
{"level":"warn","ts":"2025-04-08T23:36:24.018734+0800","logger":"etcd-client","caller":"v3@v3.5.18/retry_interceptor.go:63","msg":"retrying of unary invoker failed","target":"etcd-endpoints://0xc0000363c0/192.168.56.121:2379","attempt":0,"error":"rpc error: code = DeadlineExceeded desc = latest balancer error: last connection error: connection error: desc = \"transport: authentication handshake failed: tls: failed to verify certificate: x509: certificate signed by unknown authority\""}
Error: context deadline exceeded
[root@etcd-node2 ~]#


# 节点node3执行命令
[root@etcd-node3 ~]# etcdctl --endpoints=$ENDPOINTS --write-out=table  member list
{"level":"warn","ts":"2025-04-08T23:36:51.010425+0800","logger":"etcd-client","caller":"v3@v3.5.18/retry_interceptor.go:63","msg":"retrying of unary invoker failed","target":"etcd-endpoints://0xc000036b40/192.168.56.121:2379","attempt":0,"error":"rpc error: code = DeadlineExceeded desc = latest balancer error: last connection error: connection error: desc = \"transport: authentication handshake failed: tls: failed to verify certificate: x509: certificate signed by unknown authority\""}
Error: context deadline exceeded3.1.2 指定证书信息查看集群成员列表
指定证书信息,执行以下命令:
etcdctl --endpoints=$ENDPOINTS --cacert=/etc/etcd/ssl/ca.crt --cert=/etc/etcd/ssl/client.crt --key=/etc/etcd/ssl/client.key --write-out=table member list节点node1执行查看集群成员列表:
[root@etcd-node1 ~]# etcdctl --endpoints=$ENDPOINTS --cacert=/etc/etcd/ssl/ca.crt --cert=/etc/etcd/ssl/client.crt --key=/etc/etcd/ssl/client.key --write-out=table  member list
+------------------+---------+-------+-----------------------------+-----------------------------+------------+
|        ID        | STATUS  | NAME  |         PEER ADDRS          |        CLIENT ADDRS         | IS LEARNER |
+------------------+---------+-------+-----------------------------+-----------------------------+------------+
| a7d7b09bf04ad21b | started | node3 | https://192.168.56.123:2380 | https://192.168.56.123:2379 |      false |
| d553b4da699c7263 | started | node2 | https://192.168.56.122:2380 | https://192.168.56.122:2379 |      false |
| e14cb1abc9daea5b | started | node1 | https://192.168.56.121:2380 | https://192.168.56.121:2379 |      false |
+------------------+---------+-------+-----------------------------+-----------------------------+------------+
[root@etcd-node1 ~]#实际效果图:

节点node2执行查看集群成员列表:
[root@etcd-node2 ~]# etcdctl --endpoints=$ENDPOINTS --cacert=/etc/etcd/ssl/ca.crt --cert=/etc/etcd/ssl/client.crt --key=/etc/etcd/ssl/client.key --write-out=table  member list
+------------------+---------+-------+-----------------------------+-----------------------------+------------+
|        ID        | STATUS  | NAME  |         PEER ADDRS          |        CLIENT ADDRS         | IS LEARNER |
+------------------+---------+-------+-----------------------------+-----------------------------+------------+
| a7d7b09bf04ad21b | started | node3 | https://192.168.56.123:2380 | https://192.168.56.123:2379 |      false |
| d553b4da699c7263 | started | node2 | https://192.168.56.122:2380 | https://192.168.56.122:2379 |      false |
| e14cb1abc9daea5b | started | node1 | https://192.168.56.121:2380 | https://192.168.56.121:2379 |      false |
+------------------+---------+-------+-----------------------------+-----------------------------+------------+
[root@etcd-node2 ~]#实际效果图:

节点node3执行查看集群成员列表:
[root@etcd-node3 ~]# etcdctl --endpoints=$ENDPOINTS --cacert=/etc/etcd/ssl/ca.crt --cert=/etc/etcd/ssl/client.crt --key=/etc/etcd/ssl/client.key --write-out=table  member list
+------------------+---------+-------+-----------------------------+-----------------------------+------------+
|        ID        | STATUS  | NAME  |         PEER ADDRS          |        CLIENT ADDRS         | IS LEARNER |
+------------------+---------+-------+-----------------------------+-----------------------------+------------+
| a7d7b09bf04ad21b | started | node3 | https://192.168.56.123:2380 | https://192.168.56.123:2379 |      false |
| d553b4da699c7263 | started | node2 | https://192.168.56.122:2380 | https://192.168.56.122:2379 |      false |
| e14cb1abc9daea5b | started | node1 | https://192.168.56.121:2380 | https://192.168.56.121:2379 |      false |
+------------------+---------+-------+-----------------------------+-----------------------------+------------+
[root@etcd-node3 ~]#实际效果图:

3.2 查看集群状态信息
etcdctl --endpoints=$ENDPOINTS --cacert=/etc/etcd/ssl/ca.crt --cert=/etc/etcd/ssl/client.crt --key=/etc/etcd/ssl/client.key --write-out=table endpoint status在三个节点查看到信息应该是一样的,类似如下所示:
[root@etcd-node1 ~]# etcdctl --endpoints=$ENDPOINTS --cacert=/etc/etcd/ssl/ca.crt --cert=/etc/etcd/ssl/client.crt --key=/etc/etcd/ssl/client.key --write-out=table  endpoint status
+-----------------------------+------------------+---------+---------+-----------+------------+-----------+------------+--------------------+--------+
|          ENDPOINT           |        ID        | VERSION | DB SIZE | IS LEADER | IS LEARNER | RAFT TERM | RAFT INDEX | RAFT APPLIED INDEX | ERRORS |
+-----------------------------+------------------+---------+---------+-----------+------------+-----------+------------+--------------------+--------+
| https://192.168.56.121:2379 | e14cb1abc9daea5b |  3.5.18 |   20 kB |     false |      false |         5 |         42 |                 42 |        |
| https://192.168.56.122:2379 | d553b4da699c7263 |  3.5.18 |   20 kB |     false |      false |         5 |         42 |                 42 |        |
| https://192.168.56.123:2379 | a7d7b09bf04ad21b |  3.5.18 |   20 kB |      true |      false |         5 |         42 |                 42 |        |
+-----------------------------+------------------+---------+---------+-----------+------------+-----------+------------+--------------------+--------+
[root@etcd-node1 ~]#
可以看到,节点node3是Leader。
3.3 查看集群健康状态
etcdctl --endpoints=$ENDPOINTS --cacert=/etc/etcd/ssl/ca.crt --cert=/etc/etcd/ssl/client.crt --key=/etc/etcd/ssl/client.key --write-out=table endpoint health在三个节点查看到信息应该是一样的,类似如下所示:
[root@etcd-node1 ~]# etcdctl --endpoints=$ENDPOINTS --cacert=/etc/etcd/ssl/ca.crt --cert=/etc/etcd/ssl/client.crt --key=/etc/etcd/ssl/client.key --write-out=table  endpoint health
+-----------------------------+--------+-------------+-------+
|          ENDPOINT           | HEALTH |    TOOK     | ERROR |
+-----------------------------+--------+-------------+-------+
| https://192.168.56.123:2379 |   true | 11.750855ms |       |
| https://192.168.56.121:2379 |   true | 11.735305ms |       |
| https://192.168.56.122:2379 |   true | 11.716912ms |       |
+-----------------------------+--------+-------------+-------+
[root@etcd-node1 ~]#可以看到,三个节点健康都是true正常的。
3.4 集群的数据读写
在节点1上写入数据:
[root@etcd-node1 ~]# etcdctl --endpoints=$ENDPOINTS --cacert=/etc/etcd/ssl/ca.crt --cert=/etc/etcd/ssl/client.crt --key=/etc/etcd/ssl/client.key put greeting "Hello, etcd"
OK
[root@etcd-node1 ~]#然后在三个节点上获取数据:
[root@etcd-node1 ~]# etcdctl --endpoints=$ENDPOINTS --cacert=/etc/etcd/ssl/ca.crt --cert=/etc/etcd/ssl/client.crt --key=/etc/etcd/ssl/client.key get greeting
greeting
Hello, etcd
[root@etcd-node1 ~]#


[root@etcd-node2 ~]# etcdctl --endpoints=$ENDPOINTS --cacert=/etc/etcd/ssl/ca.crt --cert=/etc/etcd/ssl/client.crt --key=/etc/etcd/ssl/client.key get greeting
greeting
Hello, etcd
[root@etcd-node2 ~]#


[root@etcd-node3 ~]# etcdctl --endpoints=$ENDPOINTS --cacert=/etc/etcd/ssl/ca.crt --cert=/etc/etcd/ssl/client.crt --key=/etc/etcd/ssl/client.key get greeting
greeting
Hello, etcd
[root@etcd-node3 ~]#三个节点都正常获取到数据了。
3.5 设置快捷命令
每次都使用etcdctl --endpoints=$ENDPOINTS --cacert=/etc/etcd/ssl/ca.crt --cert=/etc/etcd/ssl/client.crt --key=/etc/etcd/ssl/client.key --write-out=table endpoint status之类的命令实在太麻烦了,下面使用alias配置快捷命令。
将以下信息写入到~/.bashrc配置文件中:
# ETCD相关快捷命令
alias etcdctl='etcdctl --endpoints=$ENDPOINTS --cacert=/etc/etcd/ssl/ca.crt --cert=/etc/etcd/ssl/client.crt --key=/etc/etcd/ssl/client.key'
# 查看etcd集群成员信息
alias ecm='etcdClusterMember'
alias etcdClusterMember='etcdctl --write-out=table member list'
# 查看etcd集群状态信息
alias ecs='etcdClusterStatus'
alias etcdClusterStatus='etcdctl --write-out=table endpoint status'
# 查看etcd集群健康状态
alias ech='etcdClusterHealth'
alias etcdClusterHealth='etcdctl --write-out=table endpoint health'然后使用source ~/.bashrc使配置生效。
测试快捷命令:
[root@etcd-node1 ~]# alias|grep etcd
alias ech='etcdClusterHealth'
alias ecm='etcdClusterMember'
alias ecs='etcdClusterStatus'
alias etcdClusterHealth='etcdctl --write-out=table endpoint health'
alias etcdClusterMember='etcdctl --write-out=table member list'
alias etcdClusterStatus='etcdctl --write-out=table endpoint status'
alias etcdctl='etcdctl --endpoints=$ENDPOINTS --cacert=/etc/etcd/ssl/ca.crt --cert=/etc/etcd/ssl/client.crt --key=/etc/etcd/ssl/client.key'
[root@etcd-node1 ~]# ech
+-----------------------------+--------+------------+-------+
|          ENDPOINT           | HEALTH |    TOOK    | ERROR |
+-----------------------------+--------+------------+-------+
| https://192.168.56.123:2379 |   true | 6.432198ms |       |
| https://192.168.56.121:2379 |   true | 7.296842ms |       |
| https://192.168.56.122:2379 |   true | 9.204964ms |       |
+-----------------------------+--------+------------+-------+
[root@etcd-node1 ~]# ecm
+------------------+---------+-------+-----------------------------+-----------------------------+------------+
|        ID        | STATUS  | NAME  |         PEER ADDRS          |        CLIENT ADDRS         | IS LEARNER |
+------------------+---------+-------+-----------------------------+-----------------------------+------------+
| a7d7b09bf04ad21b | started | node3 | https://192.168.56.123:2380 | https://192.168.56.123:2379 |      false |
| d553b4da699c7263 | started | node2 | https://192.168.56.122:2380 | https://192.168.56.122:2379 |      false |
| e14cb1abc9daea5b | started | node1 | https://192.168.56.121:2380 | https://192.168.56.121:2379 |      false |
+------------------+---------+-------+-----------------------------+-----------------------------+------------+
[root@etcd-node1 ~]# ecs
+-----------------------------+------------------+---------+---------+-----------+------------+-----------+------------+--------------------+--------+
|          ENDPOINT           |        ID        | VERSION | DB SIZE | IS LEADER | IS LEARNER | RAFT TERM | RAFT INDEX | RAFT APPLIED INDEX | ERRORS |
+-----------------------------+------------------+---------+---------+-----------+------------+-----------+------------+--------------------+--------+
| https://192.168.56.121:2379 | e14cb1abc9daea5b |  3.5.18 |   20 kB |     false |      false |         5 |         58 |                 58 |        |
| https://192.168.56.122:2379 | d553b4da699c7263 |  3.5.18 |   20 kB |     false |      false |         5 |         58 |                 58 |        |
| https://192.168.56.123:2379 | a7d7b09bf04ad21b |  3.5.18 |   20 kB |      true |      false |         5 |         58 |                 58 |        |
+-----------------------------+------------------+---------+---------+-----------+------------+-----------+------------+--------------------+--------+
[root@etcd-node1 ~]# etcdctl get greeting
greeting
Hello, etcd
[root@etcd-node1 ~]#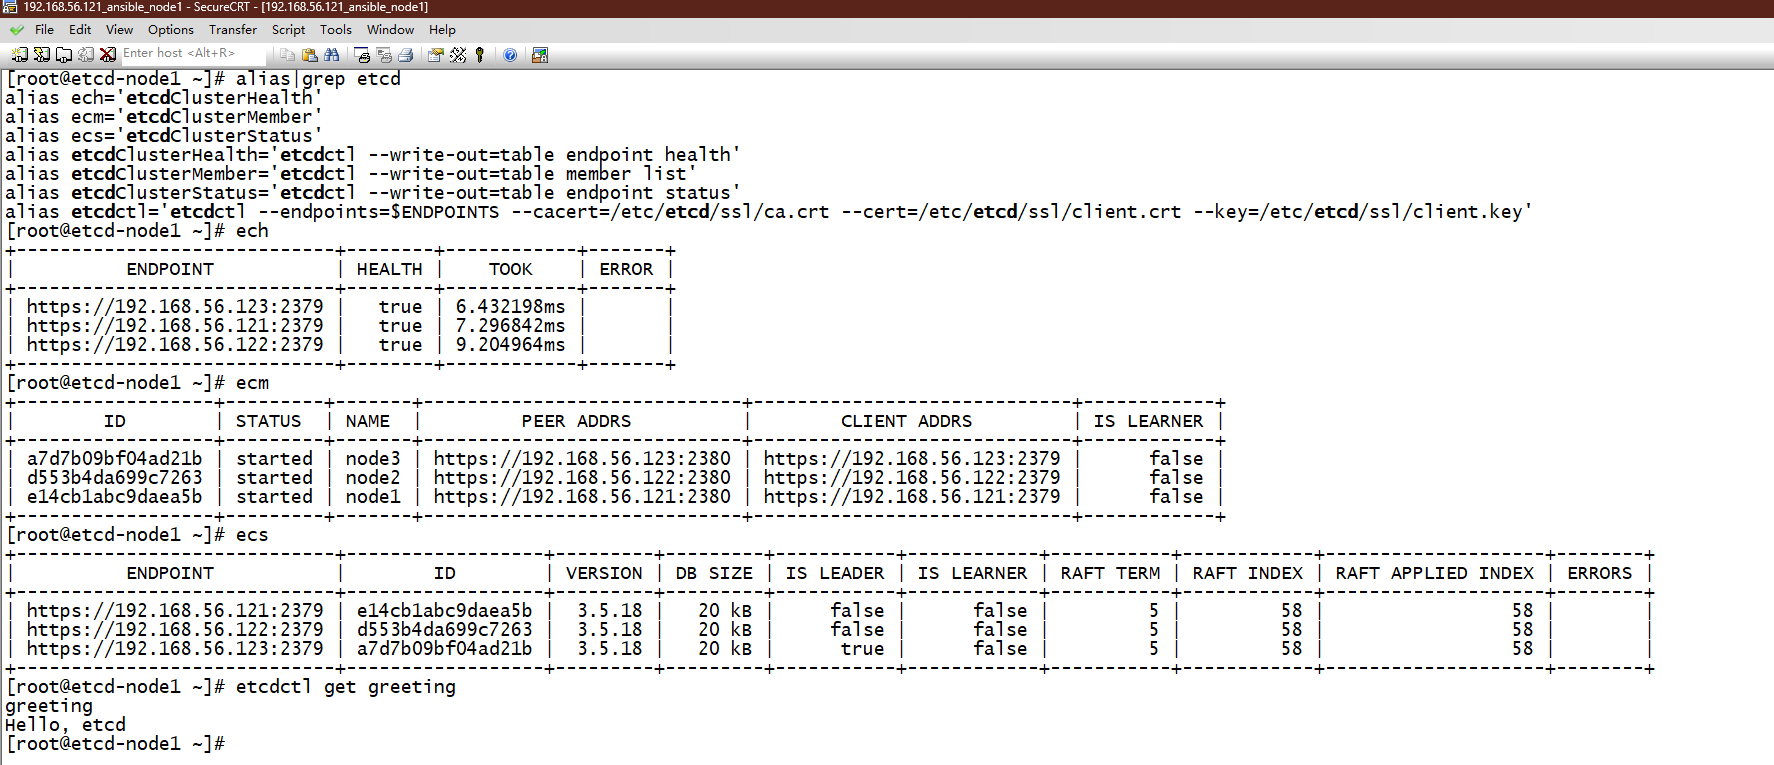
可以看到,快捷命令正常工作!
参考: