setup事实变量模块
1. 概要
playbook剧本会自动调用此模块,以收集有关剧本中可以使用的远程主机的有用变量。- 也可以通过
ansible命令来调用该模块,以获取主机可以使用哪些变量。 fact是指Ansible管理事实,是指被控主机上自动检查到的变量。- 可以在剧本中像常规变量一样使用这些
fact事实变量。 - 官方文档: https://docs.ansible.com/ansible/latest/collections/ansible/builtin/setup_module.html
- 自定义事实变量 https://docs.ansible.com/ansible/latest/user_guide/playbooks_vars_facts.html#adding-custom-facts
- 特殊变量 https://docs.ansible.com/ansible/latest/reference_appendices/special_variables.html#special-variables
2. 参数
| Parameter参数 | Comments 说明 |
|---|---|
| fact_path path | 远程主机事实文件 (*.fact)存放的路径.可以是可执行文件,也可以是json或ini格式的可读文件。 默认值: “/etc/ansible/facts.d” |
| filter list / elements=string | 需要过滤的fact事实列表. 默认值: [] |
| gather_subset list / elements=string | 事实子集. 可取值: all, all_ipv4_addresses, all_ipv6_addresses, apparmor, architecture, caps, chroot,cmdline, date_time, default_ipv4, default_ipv6, devices, distribution, distribution_major_version, distribution_release, distribution_version, dns, effective_group_ids, effective_user_id, env, facter, fips, hardware, interfaces, is_chroot, iscsi, kernel, local, lsb, machine, machine_id, mounts, network, ohai, os_family, pkg_mgr, platform, processor, processor_cores, processor_count, python, python_version, real_user_id, selinux, service_mgr, ssh_host_key_dsa_public, ssh_host_key_ecdsa_public, ssh_host_key_ed25519_public, ssh_host_key_rsa_public, ssh_host_pub_keys, ssh_pub_keys, system, system_capabilities, system_capabilities_enforced, user, user_dir, user_gecos, user_gid, user_id, user_shell, user_uid, virtual, virtualization_role, virtualization_type. 可用多个值组成列表形成一个大的子集.也可以使用!表示取反,不包括对应的事实, 如: !hardware,!network,!virtual,!ohai,!facter. !all 则表示只取最小的事实子集. 如果连最小的事实子集也不像要,则指定成 !all,!min. 为了收集指定事实,则可以使用 !all,!min, 并指定这些特定事实子集. 如果你不想展示某些事实,请使用filter参数。 默认值: “all” |
| gather_timeout integer | 超时时间(秒). 默认值: 10 |
3. 注意事项
filter参数只能过滤ansible_facts下的第一级子键。
4. 官方示例
# Display facts from all hosts and store them indexed by I(hostname) at C(/tmp/facts).
# ansible all -m ansible.builtin.setup --tree /tmp/facts

# Display only facts regarding memory found by ansible on all hosts and output them.
# ansible all -m ansible.builtin.setup -a 'filter=ansible_*_mb'

# Display only facts returned by facter.
# ansible all -m ansible.builtin.setup -a 'filter=facter_*'

# Collect only facts returned by facter.
# ansible all -m ansible.builtin.setup -a 'gather_subset=!all,facter'

- name: Collect only facts returned by facter
  ansible.builtin.setup:
    gather_subset:
      - '!all'
      - '!<any valid subset>'
      - facter

- name: Collect only selected facts
  ansible.builtin.setup:
    filter:
      - 'ansible_distribution'
      - 'ansible_machine_id'
      - 'ansible_*_mb'

# Display only facts about certain interfaces.
# ansible all -m ansible.builtin.setup -a 'filter=ansible_eth[0-2]'

# Restrict additional gathered facts to network and virtual (includes default minimum facts)
# ansible all -m ansible.builtin.setup -a 'gather_subset=network,virtual'

# Collect only network and virtual (excludes default minimum facts)
# ansible all -m ansible.builtin.setup -a 'gather_subset=!all,network,virtual'

# Do not call puppet facter or ohai even if present.
# ansible all -m ansible.builtin.setup -a 'gather_subset=!facter,!ohai'

# Only collect the default minimum amount of facts:
# ansible all -m ansible.builtin.setup -a 'gather_subset=!all'

# Collect no facts, even the default minimum subset of facts:
# ansible all -m ansible.builtin.setup -a 'gather_subset=!all,!min'

# Display facts from Windows hosts with custom facts stored in C:\custom_facts.
# ansible windows -m ansible.builtin.setup -a "fact_path='c:\custom_facts'"

# Gathers facts for the machines in the dbservers group (a.k.a Delegating facts)
- hosts: app_servers
  tasks:
    - name: Gather facts from db servers
      ansible.builtin.setup:
      delegate_to: "{{ item }}"
      delegate_facts: true
loop: "{{ groups['dbservers'] }}"5. 临时命令的使用
5.1 获取节点的所有fact事实变量
我们直接使用ansible node2 -m setup查看node2节点包含哪些fact事实变量:
[ansible@master ~]$ ansible node2 -m setup
node2 | SUCCESS => {
    "ansible_facts": {
        "ansible_all_ipv4_addresses": [
            "172.18.0.1",
            "172.19.0.1",
...... 内容大多,省略
        "ansible_swapfree_mb": 0,
        "ansible_swaptotal_mb": 0,
        "ansible_system": "Linux",
        "ansible_system_capabilities": [
            ""
        ],
        "ansible_system_capabilities_enforced": "True",
        "ansible_system_vendor": "Bochs",
        "ansible_uptime_seconds": 91120274,
        "ansible_user_dir": "/home/ansible",
        "ansible_user_gecos": "",
        "ansible_user_gid": 1005,
        "ansible_user_id": "ansible",
        "ansible_user_shell": "/bin/bash",
        "ansible_user_uid": 1005,
        "ansible_userspace_architecture": "x86_64",
        "ansible_userspace_bits": "64",
        "ansible_virtualization_role": "guest",
        "ansible_virtualization_type": "kvm",
        "discovered_interpreter_python": "/usr/bin/python",
        "gather_subset": [
            "all"
        ],
        "module_setup": true
    },
    "changed": false
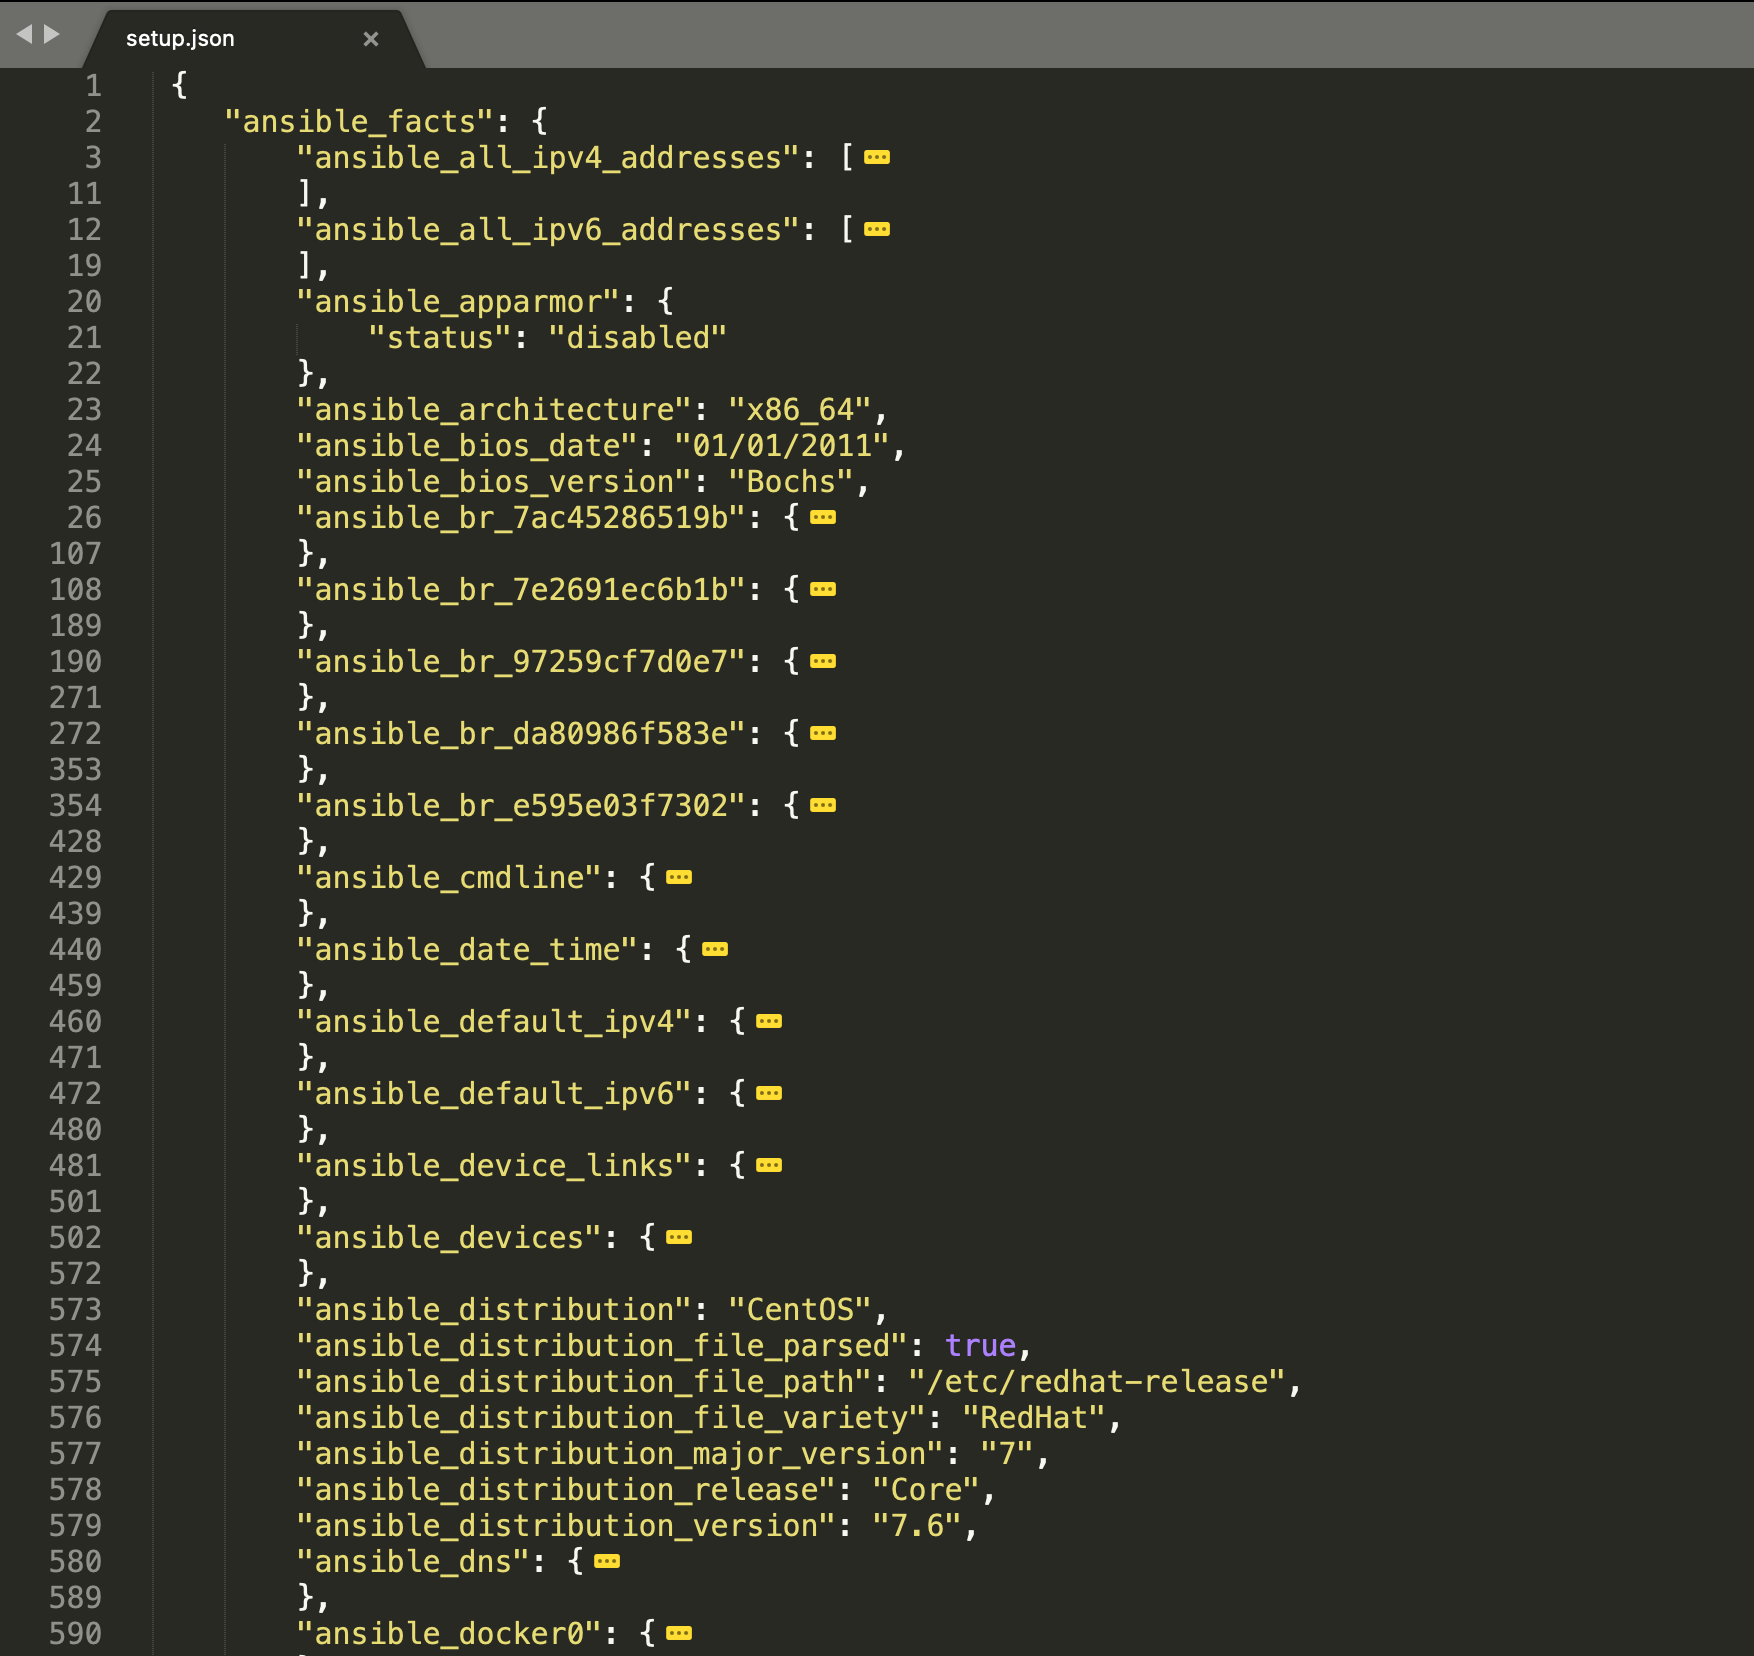
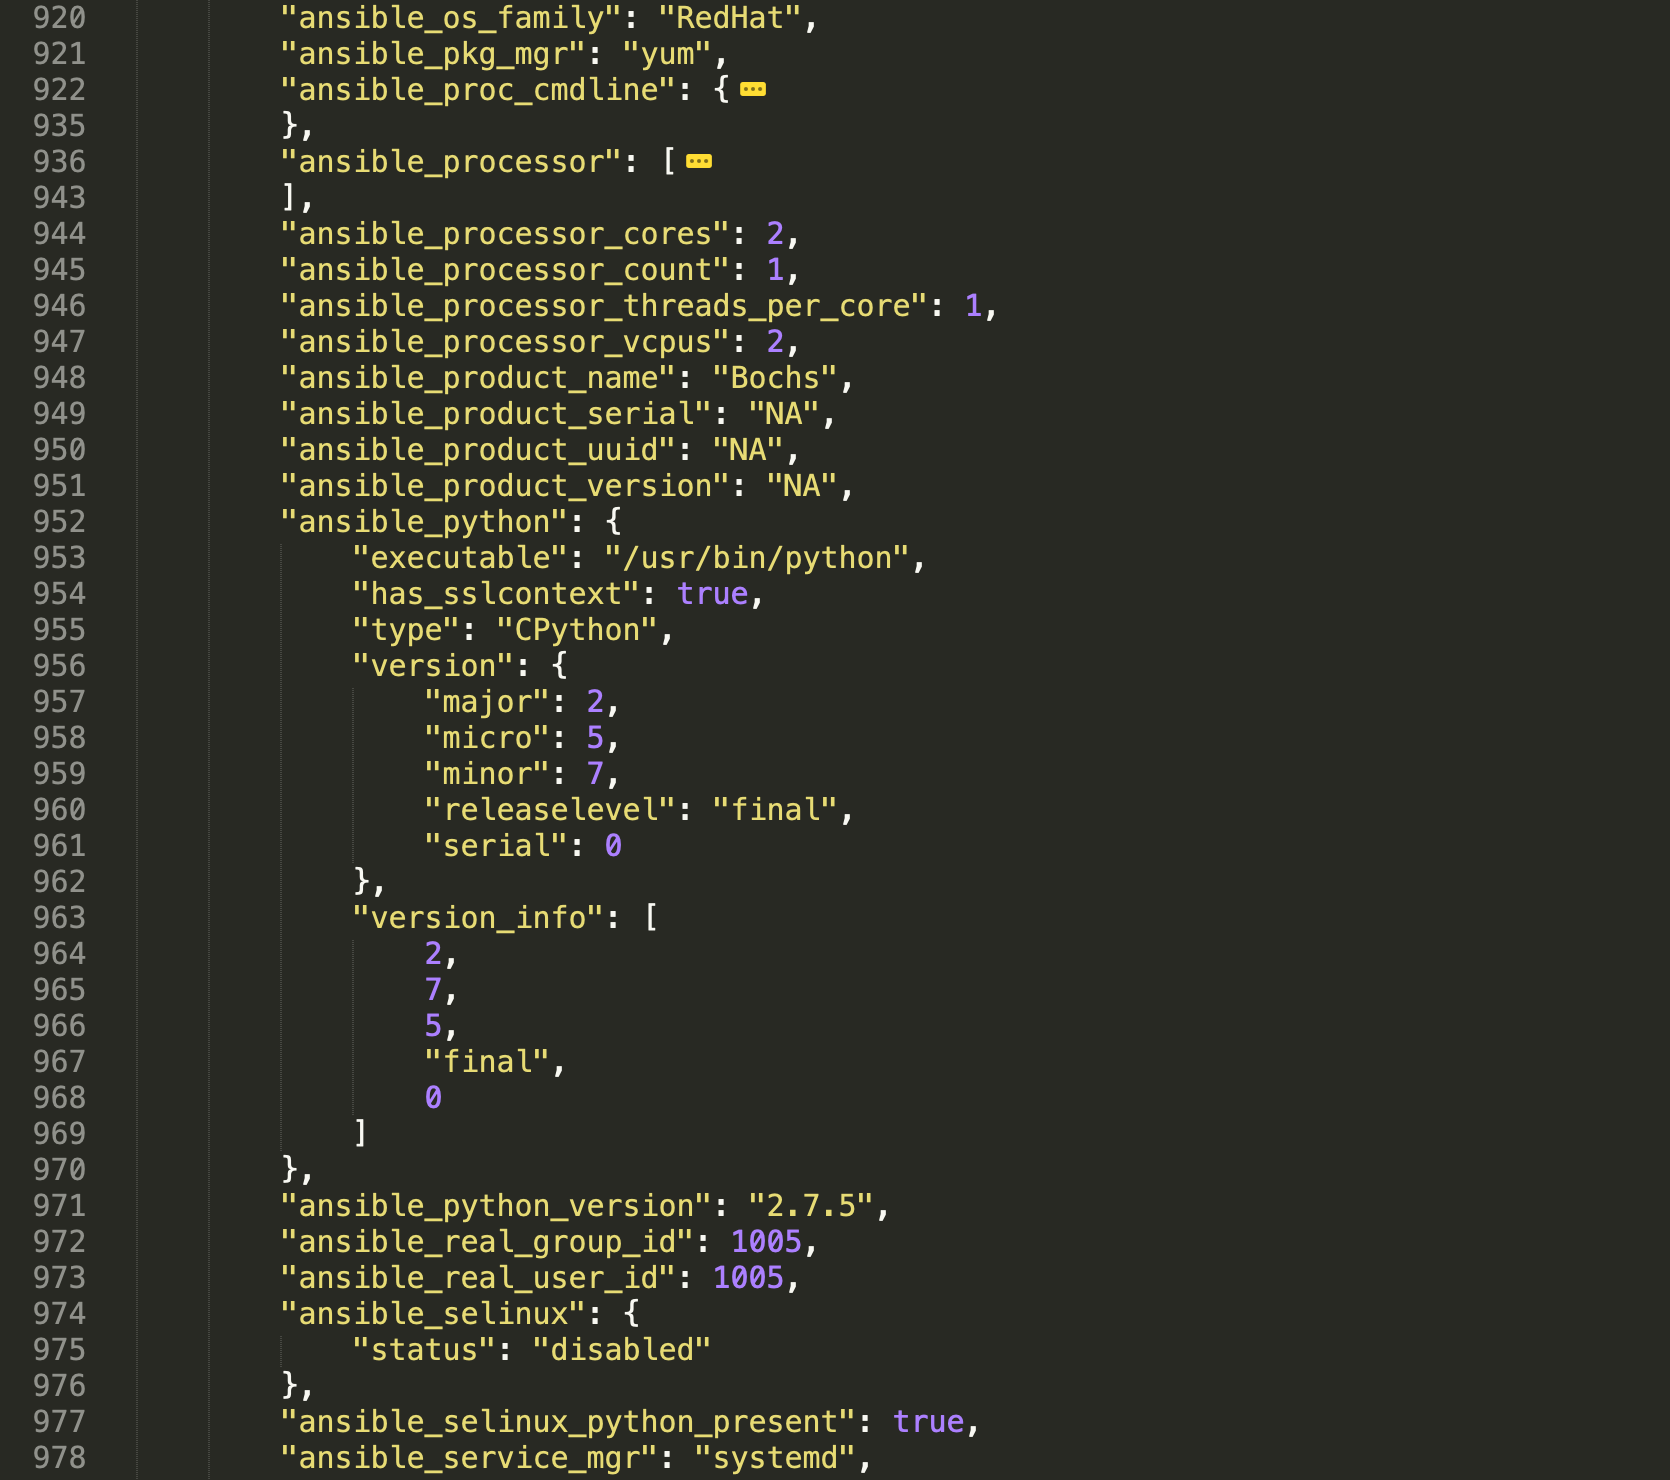
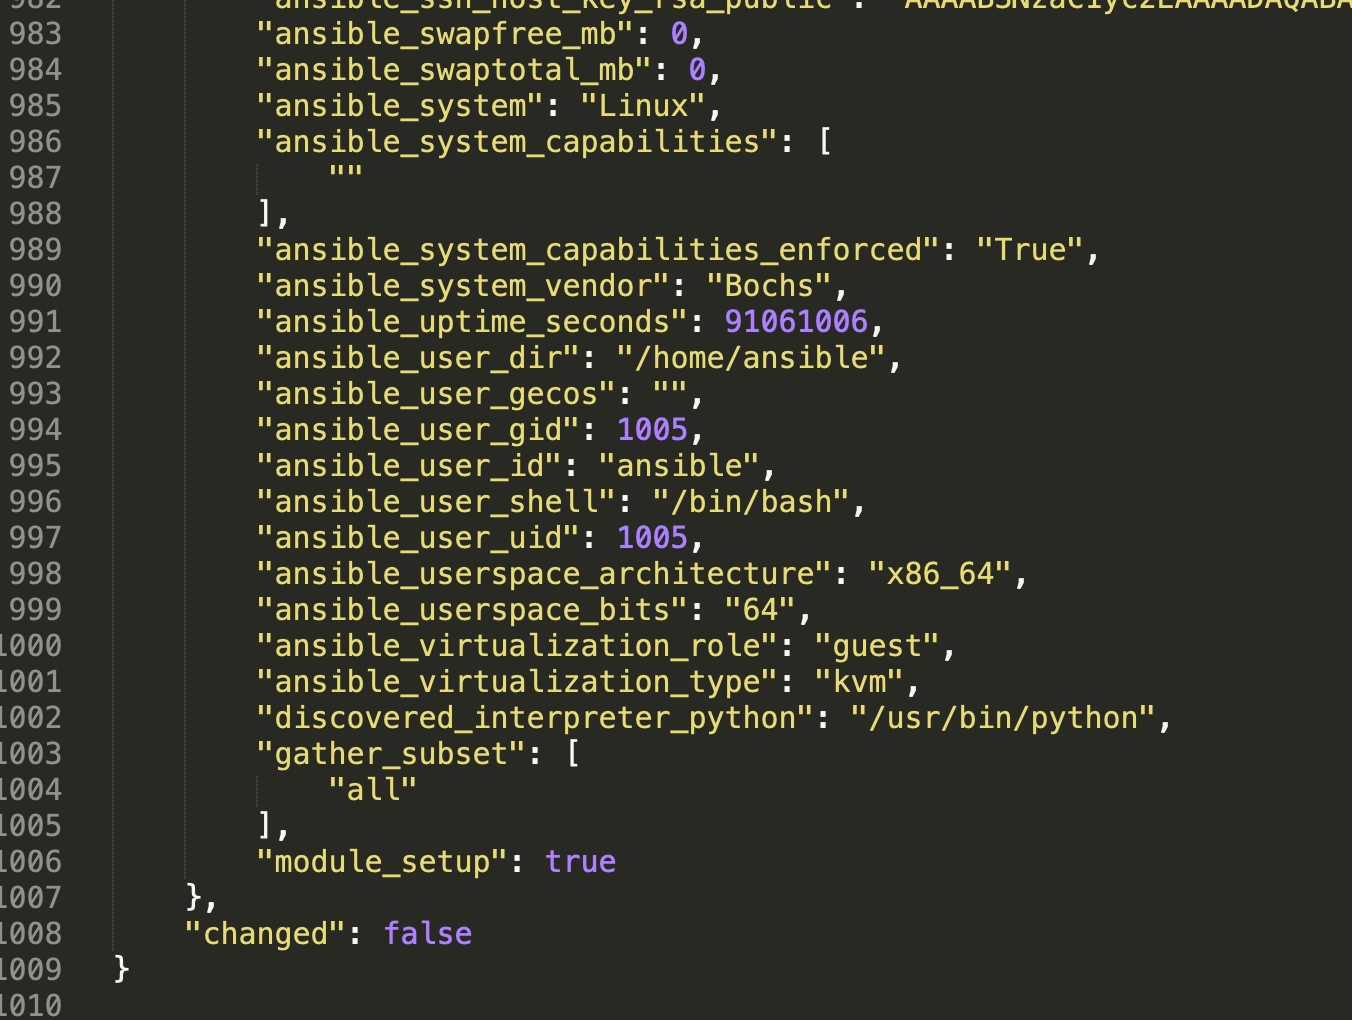
}我们将node2 | SUCCESS =>后面的内容保存到setup.json文件中,并用Sublime Text编辑器打开,并将一些不关心的细节折叠起来:
5.2 将日志存放到指定目录
可以可以使用-t / --tree参数来将日志存放到指定目录。
[ansible@master ~]$ ansible --help|grep tree
-t TREE, --tree TREE log output to this directory我们执行命令:
[ansible@master ~]$ ansible all -m setup --tree ~/facts此时,会输出日志,并且将日志保存到~/facts目录下,对应主机名文件中:
[ansible@master ~]$ ls ~/facts/
node1  node2
[ansible@master ~]$ cat ~/facts/node1|jq -C|head
{
  "ansible_facts": {
    "ansible_all_ipv4_addresses": [
      "10.0.4.16",
      "172.17.0.1"
    ],
    "ansible_all_ipv6_addresses": [
      "fe80::5054:ff:fe22:fce3",
      "fe80::42:ebff:fef1:cb42",
      "fe80::31:d4ff:fe63:9869"
[ansible@master ~]$ cat ~/facts/node2|jq -C|head
{
  "ansible_facts": {
    "ansible_all_ipv4_addresses": [
      "172.18.0.1",
      "172.19.0.1",
      "172.20.0.1",
      "172.21.0.1",
      "172.22.0.1",
      "172.23.0.1"
[ansible@master ~]$可以看到日志都输出到主机名对应的文件中了。
5.3 获取指定的事实fact
- 获取系统发行版本信息
[ansible@master ~]$ ansible node2 -m setup -a "filter=ansible_distribution"
node2 | SUCCESS => {
    "ansible_facts": {
        "ansible_distribution": "CentOS",
        "discovered_interpreter_python": "/usr/bin/python"
    },
    "changed": false
}
[ansible@master ~]$可以看到系统发行版本是CentOS。
- 获取系统架构信息
[ansible@master ~]$ ansible node2 -m setup -a "filter=ansible_architecture"
node2 | SUCCESS => {
    "ansible_facts": {
        "ansible_architecture": "x86_64",
        "discovered_interpreter_python": "/usr/bin/python"
    },
    "changed": false
}
[ansible@master ~]$可以看到系统架构是x86_64。
5.4 过滤时使用通配符
[ansible@master ~]$ ansible node2 -m ansible.builtin.setup -a 'filter=ansible_*_mb'
node2 | SUCCESS => {
    "ansible_facts": {
        "ansible_memfree_mb": 142,
        "ansible_memory_mb": {
            "nocache": {
                "free": 2928,
                "used": 861
            },
            "real": {
                "free": 142,
                "total": 3789,
                "used": 3647
            },
            "swap": {
                "cached": 0,
                "free": 0,
                "total": 0,
                "used": 0
            }
        },
        "ansible_memtotal_mb": 3789,
        "ansible_swapfree_mb": 0,
        "ansible_swaptotal_mb": 0,
        "discovered_interpreter_python": "/usr/bin/python"
    },
    "changed": false
}
[ansible@master ~]$6. 使用剧本
通常情况下,我们更多的是使用fact事实变量中某个特定变量,如IP值、CPU、内存等等信息。
6.1 获取主机内网IP
编写剧本文件setup.yml:
- hosts: all
  tasks:
    - name: Get IP of the hosts
      ansible.builtin.debug:
msg: The IP is => {{ ansible_default_ipv4['address'] }}检查语法并运行:
[ansible@master ansible_playbooks]$ ansible-lint setop.yml
[ansible@master ansible_playbooks]$ ansible-playbook setop.yml

PLAY [all] *************************************************************************************************************

TASK [Gathering Facts] *************************************************************************************************
ok: [node1]
ok: [node2]

TASK [Get IP of the hosts] *********************************************************************************************
ok: [node1] => {
    "msg": "The IP is => 192.168.12.1"
}
ok: [node2] => {
    "msg": "The IP is => 192.168.12.2"
}

PLAY RECAP *************************************************************************************************************
node1                      : ok=2    changed=0    unreachable=0    failed=0    skipped=0    rescued=0    ignored=0
node2                      : ok=2    changed=0    unreachable=0    failed=0    skipped=0    rescued=0    ignored=0

[ansible@master ansible_playbooks]$通过ansible_default_ipv4['address']可以获取到内网IP信息,我们可以将内网信息写入到/etc/motd文件中,这样每次连接到该主机时,就可能确认是否连接到正确的主机。
6.2 查看系统版本信息
编写剧本文件:
- hosts: all
  tasks:
    - name: Get distribution info
      ansible.builtin.debug:
msg: The system is {{ ansible_distribution }} {{ ansible_distribution_version }}检查语法并执行剧本:
[ansible@master ansible_playbooks]$ ansible-lint setop.yml
[ansible@master ansible_playbooks]$ ansible-playbook setop.yml

PLAY [all] *************************************************************************************************************

TASK [Gathering Facts] *************************************************************************************************
ok: [node1]
ok: [node2]

TASK [Get distribution info] *******************************************************************************************
ok: [node1] => {
    "msg": "The system is CentOS 7.6"
}
ok: [node2] => {
    "msg": "The system is CentOS 7.6"
}

PLAY RECAP *************************************************************************************************************
node1                      : ok=2    changed=0    unreachable=0    failed=0    skipped=0    rescued=0    ignored=0
node2                      : ok=2    changed=0    unreachable=0    failed=0    skipped=0    rescued=0    ignored=0

[ansible@master ansible_playbooks]$可以看到远程节点系统都是CentOS 7.6。
6.3 查看系统架构
编写剧本文件:
- hosts: all
  tasks:
    - name: Get architecture info
      ansible.builtin.debug:
msg: The system architecture is {{ ansible_architecture }}检查语法并执行剧本:
[ansible@master ansible_playbooks]$ ansible-playbook setop.yml

PLAY [all] *************************************************************************************************************

TASK [Gathering Facts] *************************************************************************************************
ok: [node1]
ok: [node2]

TASK [Get architecture info] *******************************************************************************************
ok: [node1] => {
    "msg": "The system architecture is x86_64"
}
ok: [node2] => {
    "msg": "The system architecture is x86_64"
}

PLAY RECAP *************************************************************************************************************
node1                      : ok=2    changed=0    unreachable=0    failed=0    skipped=0    rescued=0    ignored=0
node2                      : ok=2    changed=0    unreachable=0    failed=0    skipped=0    rescued=0    ignored=0

[ansible@master ansible_playbooks]$可以看到各节点系统架构是x86_64。
6.4 显示系统内存信息
显示总内存和可用内存信息:
- hosts: all
  tasks:
    - name: Get memory info
      ansible.builtin.debug:
        msg:
          - The total memory is {{ ansible_memory_mb['real']['total'] }} MB.
- The free memory is {{ ansible_memfree_mb }} MB.检查语法并执行剧本:
[ansible@master ansible_playbooks]$ ansible-lint setop.yml
[ansible@master ansible_playbooks]$ ansible-playbook setop.yml

PLAY [all] *************************************************************************************************************

TASK [Gathering Facts] *************************************************************************************************
ok: [node1]
ok: [node2]

TASK [Get memory info] *************************************************************************************************
ok: [node1] => {
    "msg": [
        "The total memory is 3789 MB.",
        "The free memory is 130 MB."
    ]
}
ok: [node2] => {
    "msg": [
        "The total memory is 3789 MB.",
        "The free memory is 340 MB."
    ]
}

PLAY RECAP *************************************************************************************************************
node1                      : ok=2    changed=0    unreachable=0    failed=0    skipped=0    rescued=0    ignored=0
node2                      : ok=2    changed=0    unreachable=0    failed=0    skipped=0    rescued=0    ignored=0

[ansible@master ansible_playbooks]$可以看到,两个主机总内存都是3789MB,可用内存才几百MB。
6.5 禁用fact事实收集功能
- playbook剧本在运行时默认都会运行"[Gathering Facts]"任务,"[Gathering Facts]"任务会收集远程主机的相关信息,这些信息会保存在对应的变量中,我们在playbook中可以使用这些变量,从而利用这些信息。我们也可以禁用fact事实收集功能。
编写剧本:
- hosts: all
  gather_facts: no
  tasks:
    - name: Get memory info
      ansible.builtin.debug:
        msg:
          - The total memory is {{ ansible_memory_mb['real']['total'] }} MB.
- The free memory is {{ ansible_memfree_mb }} MB.此时,再运行剧本,会抛出异常,提示变量未定义:
[ansible@master ansible_playbooks]$ ansible-playbook setop.yml

PLAY [all] *************************************************************************************************************

TASK [Get memory info] *************************************************************************************************
fatal: [node1]: FAILED! => {"msg": "The task includes an option with an undefined variable. The error was: 'ansible_memory_mb' is undefined\n\nThe error appears to be in '/home/ansible/ansible_playbooks/setop.yml': line 4, column 7, but may\nbe elsewhere in the file depending on the exact syntax problem.\n\nThe offending line appears to be:\n\n  tasks:\n    - name: Get memory info\n      ^ here\n"}
fatal: [node2]: FAILED! => {"msg": "The task includes an option with an undefined variable. The error was: 'ansible_memory_mb' is undefined\n\nThe error appears to be in '/home/ansible/ansible_playbooks/setop.yml': line 4, column 7, but may\nbe elsewhere in the file depending on the exact syntax problem.\n\nThe offending line appears to be:\n\n  tasks:\n    - name: Get memory info\n      ^ here\n"}

PLAY RECAP *************************************************************************************************************
node1                      : ok=0    changed=0    unreachable=0    failed=1    skipped=0    rescued=0    ignored=0
node2 : ok=0 changed=0 unreachable=0 failed=1 skipped=0 rescued=0 ignored=0此时,可以随时通过运行使用setup模块的任务来手动收集事实:
- hosts: all
  gather_facts: no
  tasks:
    - name: get ansible_facts
      setup:
    - name: Get memory info
      ansible.builtin.debug:
        msg:
          - The total memory is {{ ansible_memory_mb['real']['total'] }} MB.
- The free memory is {{ ansible_memfree_mb }} MB.此时,运行又可以正常获取到内存信息:
[ansible@master ansible_playbooks]$ ansible-playbook setop.yml

PLAY [all] *************************************************************************************************************

TASK [get ansible_facts] ***********************************************************************************************
ok: [node1]
ok: [node2]

TASK [Get memory info] *************************************************************************************************
ok: [node1] => {
    "msg": [
        "The total memory is 3789 MB.",
        "The free memory is 2690 MB."
    ]
}
ok: [node2] => {
    "msg": [
        "The total memory is 3789 MB.",
        "The free memory is 333 MB."
    ]
}

PLAY RECAP *************************************************************************************************************
node1                      : ok=2    changed=0    unreachable=0    failed=0    skipped=0    rescued=0    ignored=0
node2 : ok=2 changed=0 unreachable=0 failed=0 skipped=0 rescued=0 ignored=07. 自定义fact事实变量
如果你想添加自定义fact事实变量,你可以通过以下两种方式进行定义:
- 使用
set_fact模块定义事实变量。可参考:ansible.builtin.set_fact module - 在
/etc/ansible/facts.d目录中定义事实变量文件。可参考:Adding custom facts
本节主要介绍第2种方法。
在节点上默认是没有/etc/ansible/facts.d目录的,可以手动创建一下:
[root@node2 ~]# ls -lah /etc/ansible/facts.d
ls: cannot access /etc/ansible/facts.d: No such file or directory
[root@node2 ~]# mkdir -p /etc/ansible/facts.d
[root@node2 ~]# ls -lah /etc/ansible/facts.d
total 8.0K
drwxr-xr-x 2 root root 4.0K Sep 21 21:08 .
drwxr-xr-x 3 root root 4.0K Sep 21 21:08 ..
[root@node2 ~]#需要注意:
- 如果不通过
fact_path参数指定事实文件路径,则默认在/etc/ansible/facts.d目录读取事实文件。 - 所有自定义事实文件的文件名都需要以
.fact结尾,后缀必须为小写形式,不能是.Fact、.FACT等其他形式。 - 静态自定义事实文件不应有可执行权限。
- 动态自定义事实文件需要有可执行权限。
7.1 采用INI格式编写的静态自定义事实文件
create
/etc/ansible/facts.d/preferences.factwith this content:ini[general] asdf=1 bar=2Make sure the file is not executable as this will break the
ansible.builtin.setupmodule.
我们在node2节点上面创建该文件,并查看文件内容:
[root@node2 ~]# cd /etc/ansible/facts.d/
[root@node2 facts.d]# vi preferences.fact
[root@node2 facts.d]# cat preferences.fact
[general]
asdf=1
bar=2
[root@node2 facts.d]# ll preferences.fact
-rw-r--r-- 1 root root 23 Sep 21 21:24 preferences.fact
[root@node2 facts.d]#使用临时命令查看自定义的事实变量:
[ansible@master ~]$ ansible node2 -m ansible.builtin.setup -a "filter=ansible_local"
node2 | SUCCESS => {
    "ansible_facts": {
        "ansible_local": {
            "preferences": {
                "general": {
                    "asdf": "1",
                    "bar": "2"
                }
            }
        },
        "discovered_interpreter_python": "/usr/bin/python"
    },
    "changed": false
}
[ansible@master ~]$如果给preferences.fact增加可执行权限:
[root@node2 facts.d]# chmod u+x preferences.fact
[root@node2 facts.d]# ll
total 4
-rwxr--r-- 1 root root 23 Sep 21 21:24 preferences.fact再执行命令则会报错:
[ansible@master ~]$ ansible node2 -m ansible.builtin.setup -a "filter=ansible_local"
node2 | FAILED! => {
    "ansible_facts": {
        "discovered_interpreter_python": "/usr/bin/python"
    },
    "changed": false,
    "cmd": "/etc/ansible/facts.d/preferences.fact",
    "msg": "[Errno 13] Permission denied",
    "rc": 13
}
[ansible@master ~]$如果给preferences.fact用户组和其他用户也增加可执行权限:
[root@node2 facts.d]# chmod +x preferences.fact
[root@node2 facts.d]# ll
total 4
-rwxr-xr-x 1 root root 23 Sep 21 21:24 preferences.fact再执行命令也会报错:
[ansible@master ~]$ ansible node2 -m ansible.builtin.setup -a "filter=ansible_local"
node2 | FAILED! => {
    "ansible_facts": {
        "discovered_interpreter_python": "/usr/bin/python"
    },
    "changed": false,
    "cmd": "/etc/ansible/facts.d/preferences.fact",
    "msg": "[Errno 8] Exec format error",
    "rc": 8
}
[ansible@master ~]$即,对于静态自定义事实文件,不应增加可执行权限。
移除可执行权限后,执行命令,结果恢复正常!!
注意
The key part in the key=value pairs will be converted into lowercase inside the ansible_local variable. Using the example above, if the ini file contained XYZ=3 in the [general] section, then you should expect to access it as:
{{ ansible_local['preferences']['general']['xyz'] }}and not
{{ ansible_local['preferences']['general']['XYZ'] }}. This is because Ansible uses Python’s ConfigParser which passes all option names through the optionxform method and this method’s default implementation converts option names to lower case.
即在引用键值对时,需要使用小写字符对键进行引用。
测试一下,将文件名修改为Preferences.fact,内容中的bar修改为Bar:
[root@node2 facts.d]# cat Preferences.fact
[general]
asdf=1
Bar=2执行临时命令:
[ansible@master ~]$ ansible node2 -m ansible.builtin.setup -a "filter=ansible_local"
node2 | SUCCESS => {
    "ansible_facts": {
        "ansible_local": {
            "Preferences": {
                "general": {
                    "asdf": "1",
                    "bar": "2"
                }
            }
        },
        "discovered_interpreter_python": "/usr/bin/python"
    },
    "changed": false
}可以看到,文件名中大小写敏感,Preferences首字线已经变成大写P了。而配置bar并没有变成Bar,仍然是bar,说明ini配置的fact事实文件配置键大小写不敏感(只能用小写形式访问)。
如果将自定义事实文件后缀修改为非小写形式:
[root@node2 facts.d]# mv Preferences.fact Preferences.Fact此时再执行临时命令:
[ansible@master ~]$ ansible node2 -m ansible.builtin.setup -a "filter=ansible_local"
node2 | SUCCESS => {
    "ansible_facts": {
        "ansible_local": {},
        "discovered_interpreter_python": "/usr/bin/python"
    },
    "changed": false
}
[ansible@master ~]$可以看到,获取到的ansible_local命名空间里面的值是空的,说明没有获取到Preferences.Fact文件定义的事实变量。
再将后缀变成全部大写:
[root@node2 facts.d]# mv Preferences.Fact Preferences.FACT再执行临时命令,一样获取不到事实变量:
[ansible@master ~]$ ansible node2 -m ansible.builtin.setup -a "filter=ansible_local"
node2 | SUCCESS => {
    "ansible_facts": {
        "ansible_local": {},
        "discovered_interpreter_python": "/usr/bin/python"
    },
    "changed": false
}
[ansible@master ~]$即说明事实变量文件后缀必须是.fact小写形式。
7.2 采用JSON格式编写的静态自定义事实文件
我们也可以编写json格式的静态自定义事实文件,如编写一个json.fact文件:
root@node2 facts.d]# ll json.fact
-rw-r--r-- 1 root root 165 Sep 21 22:40 json.fact
[root@node2 facts.d]# cat json.fact |jq
{
  "users": {
    "user_one": "zhangsan",
    "user_two": "lisi"
  },
  "servers": {
    "service_one": "httpd",
    "service_two": "supervisord"
  }
}
[root@node2 facts.d]#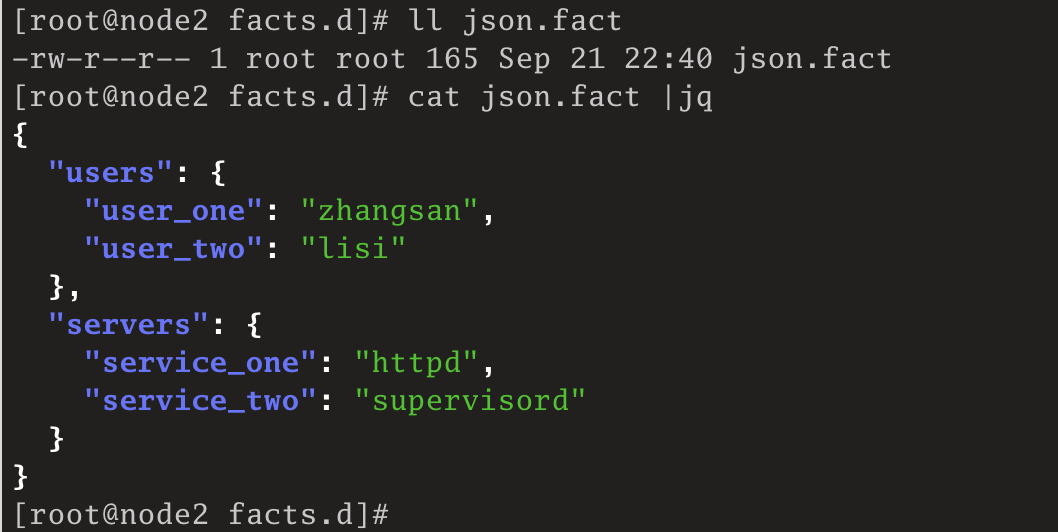
然后再执行命令:
[ansible@master ~]$ ansible node2 -m ansible.builtin.setup -a "filter=ansible_local"
node2 | SUCCESS => {
    "ansible_facts": {
        "ansible_local": {
            "json": {
                "servers": {
                    "service_one": "httpd",
                    "service_two": "vsftpd"
                },
                "users": {
                    "user_one": "zhangsan",
                    "user_two": "lisi"
                }
            },
            "preferences": {
                "general": {
                    "asdf": "1",
                    "bar": "2"
                }
            }
        },
        "discovered_interpreter_python": "/usr/bin/python"
    },
    "changed": false
}
[ansible@master ~]$可以看到,已经获取到JSON文件定义的事实变量了。
注意,JSON文件大小写敏感:
[root@node2 facts.d]# mv json.fact JSON.fact
[root@node2 facts.d]# vi JSON.fact
[root@node2 facts.d]# cat JSON.fact |jq
{
  "USERS": {
    "user_one": "zhangsan",
    "user_two": "lisi"
  },
  "servers": {
    "service_one": "httpd",
    "service_two": "supervisord"
  }
}
[root@node2 facts.d]#将文件名从json.fact改成了JSON.fact,文件内容中users改成了USERS,此时再执行临时命令:
[ansible@master ~]$ ansible node2 -m ansible.builtin.setup -a "filter=ansible_local"
node2 | SUCCESS => {
    "ansible_facts": {
        "ansible_local": {
            "JSON": {
                "USERS": {
                    "user_one": "zhangsan",
                    "user_two": "lisi"
                },
                "servers": {
                    "service_one": "httpd",
                    "service_two": "supervisord"
                }
            },
            "preferences": {
                "general": {
                    "asdf": "1",
                    "bar": "2"
                }
            }
        },
        "discovered_interpreter_python": "/usr/bin/python"
    },
    "changed": false
}
[ansible@master ~]$此时,可以看到,输出结果中JSON和USERS也是大写输出,说明大小写敏感。
7.3 动态自定义事实文件
7.3.1 使用shell脚本输出json数据
我们尝试使用shell脚本,输出一个JSON数据作为事实文件:
[root@node2 facts.d]# cat data.json
{
   "USERS": {
      "user_one": "zhangsan",
      "user_two": "lisi"
   },
   "SERVICES": {
      "service_one": "httpd",
      "service_two": "supervisord"
   }
}
[root@node2 facts.d]# cat shell.fact
#!/bin/bash
cat /etc/ansible/facts.d/data.json|jq
[root@node2 facts.d]# ll shell.fact
-rw-r--r-- 1 root root 50 Sep 21 23:07 shell.fact
[root@node2 facts.d]# sh shell.fact
{
  "USERS": {
    "user_one": "zhangsan",
    "user_two": "lisi"
  },
  "SERVICES": {
    "service_one": "httpd",
    "service_two": "supervisord"
  }
}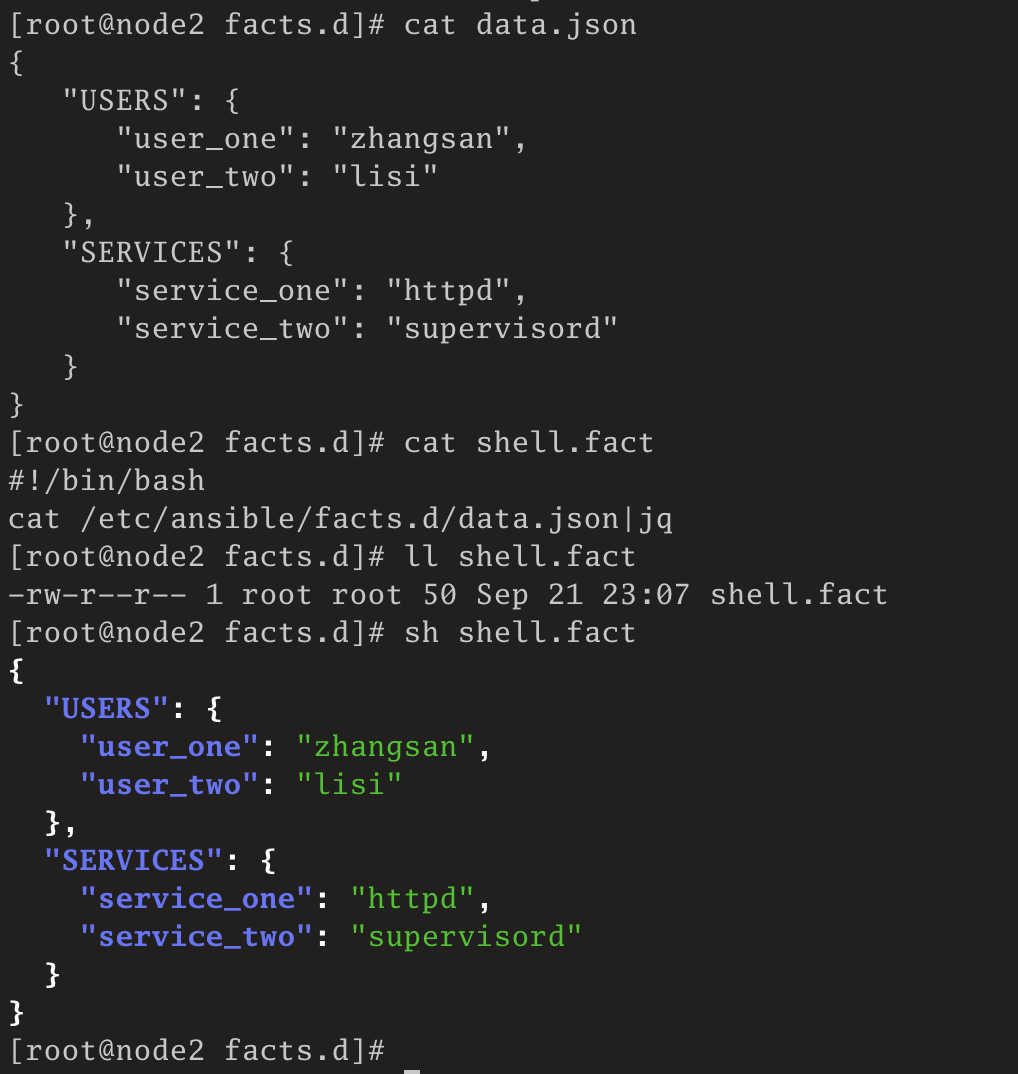
此时,shell.fact没有可执行权限。直接执行临时命令:
[ansible@master ~]$ ansible node2 -m ansible.builtin.setup -a "filter=ansible_local"
[WARNING]: error loading fact - please check content
node2 | SUCCESS => {
    "ansible_facts": {
        "ansible_local": {
            "shell": "error loading fact - please check content"
        },
        "discovered_interpreter_python": "/usr/bin/python"
    },
    "changed": false
}
[ansible@master ~]$
此时,因为shell.fact没有可执行权限,Ansible认为该文件是一个静态事实文件,但这个文件既不是ini格式的文件,也不是json格式的文件,此时Ansible就报解析文件内容异常了。
给shell.fact增加可执行权限:
[root@node2 facts.d]# chmod u+x shell.fact
[root@node2 facts.d]# ll shell.fact
-rwxr--r-- 1 root root 50 Sep 21 23:07 shell.fact此时执行临时命令,会提示没有权限:
[ansible@master ~]$ ansible node2 -m ansible.builtin.setup -a "filter=ansible_local"
node2 | FAILED! => {
    "ansible_facts": {
        "discovered_interpreter_python": "/usr/bin/python"
    },
    "changed": false,
    "cmd": "/etc/ansible/facts.d/shell.fact",
    "msg": "[Errno 13] Permission denied",
    "rc": 13
}
[ansible@master ~]$应该是给other增加可执行权限,或者使用--become提升权限:
[ansible@master ~]$ ansible --help|grep 'become'
usage: ansible [-h] [--version] [-v] [-b] [--become-method BECOME_METHOD]
               [--become-user BECOME_USER] [-K] [-i INVENTORY] [--list-hosts]
  control how and which user you become as on target hosts
  --become-method BECOME_METHOD
                        `ansible-doc -t become -l` to list valid choices.
  --become-user BECOME_USER
  -K, --ask-become-pass
  -b, --become          run operations with become (does not imply password
[ansible@master ~]$给其他用户增加可执行权限:
[root@node2 facts.d]# chmod o+x shell.fact
[root@node2 facts.d]# ll shell.fact
-rwxr--r-x 1 root root 50 Sep 21 23:07 shell.fact再执行临时命令:
[ansible@master ~]$ ansible node2 -m ansible.builtin.setup -a "filter=ansible_local"
node2 | SUCCESS => {
    "ansible_facts": {
        "ansible_local": {
            "shell": {
                "SERVICES": {
                    "service_one": "httpd",
                    "service_two": "supervisord"
                },
                "USERS": {
                    "user_one": "zhangsan",
                    "user_two": "lisi"
                }
            }
        },
        "discovered_interpreter_python": "/usr/bin/python"
    },
    "changed": false
}
[ansible@master ~]$此时,可以看到,获取到了shell.fact动态自定义事实文件返回的JSON数据。说明配置生效了。
正确的做法是,不应给other用户增加可执行权限,而是用--become进行权限提升:
[root@node2 facts.d]# chmod o-x shell.fact
[root@node2 facts.d]# ll shell.fact
-rwxr--r-- 1 root root 50 Sep 21 23:07 shell.fact然后执行临时命令,增加--become参数:
[ansible@master ~]$ ansible node2 --become -m ansible.builtin.setup -a "filter=ansible_local"
node2 | SUCCESS => {
    "ansible_facts": {
        "ansible_local": {
            "shell": {
                "SERVICES": {
                    "service_one": "httpd",
                    "service_two": "supervisord"
                },
                "USERS": {
                    "user_one": "zhangsan",
                    "user_two": "lisi"
                }
            }
        },
        "discovered_interpreter_python": "/usr/bin/python"
    },
    "changed": false
}
[ansible@master ~]$此时,可以看到正常获取到动态自定义事实文件中的变量数据了。
7.3.2 使用python脚本输出json数据
我们也可以使用Python脚本来输出json数据作为事实变量。
[root@node2 facts.d]# ls -lh python.fact
-rwxr--r-- 1 root root 137 Sep 22 19:33 python.fact
[root@node2 facts.d]# cat python.fact
#!/usr/bin/python3
import json

data = {
    "user": {
        "one": "zhangsan",
        "two": "lisi"
    }
}

print(json.dumps(data))
[root@node2 facts.d]# python3 python.fact
{"user": {"one": "zhangsan", "two": "lisi"}}执行临时命令:
[ansible@master ansible_playbooks]$ ansible node2 --become -m ansible.builtin.setup -a "filter=ansible_local"
node2 | SUCCESS => {
    "ansible_facts": {
        "ansible_local": {
            "python": {
                "user": {
                    "one": "zhangsan",
                    "two": "lisi"
                }
            },
            "shell": {
                "SERVICES": {
                    "service_one": "httpd",
                    "service_two": "supervisord"
                },
                "USERS": {
                    "user_one": "zhangsan",
                    "user_two": "lisi"
                }
            }
        },
        "discovered_interpreter_python": "/usr/bin/python"
    },
    "changed": false
}可以看到,获取到Python脚本中输出的变量user了。
7.4 在剧本中获取自定义事实变量
- hosts: node2
  gather_facts: no
  tasks:
    - name: Get ansible_local facts info
      ansible.builtin.setup:
        filter:
          - ansible_local
      become: yes

    - name: Check the service status
      service:
        name: "{{ ansible_local['shell']['SERVICES']['service_one'] }}"
        state: stopped

    - name: Check the user status
      debug:
msg: "{{ ansible_local['python']['user'] }}"执行剧本:
[ansible@master ansible_playbooks]$ ansible-playbook setop.yml -v
Using /etc/ansible/ansible.cfg as config file

PLAY [node2] ***********************************************************************************************************

TASK [Get ansible_local facts info] ************************************************************************************
ok: [node2]

TASK [Check the service status] ****************************************************************************************
ok: [node2] => {"changed": false, "name": "httpd", "state": "stopped"}

TASK [Check the user status] *******************************************************************************************
ok: [node2] => {
    "msg": {
        "one": "zhangsan",
        "two": "lisi"
    }
}

PLAY RECAP *************************************************************************************************************
node2                      : ok=3    changed=0    unreachable=0    failed=0    skipped=0    rescued=0    ignored=0

[ansible@master ansible_playbooks]$可以看到,正常获取到服务httpd的信息,并查看到其服务状态是停止状态的。也打印出来python脚本返回的用户信息。
参考: